

Long story short: When choosing a motorcycle headlight, look at compatibility, beam performance, and Indian regulations, not just the advertised brightness. This guide covers light sources, headlamp designs, what to check before replacing, maintenance, and costs.
If you need to replace a bulb or want a new headlamp, begin by checking your motorcycle’s specifications. The next sections show what to look for before buying, how to compare products, and when to get expert help.
Key Takeaways
- Distinguish light sources—halogen, LED, and HID—from optical designs such as reflector and projector.
- Check the exact motorcycle and replacement specifications before buying.
- Compare complete headlamp performance rather than relying only on advertised lumens or technology labels.
- Check applicable Indian lighting requirements and request relevant product documentation.
- Use manufacturer-specific guidance for maintenance, adjustment, lifespan claims, and replacement parts.
How Does A Motorcycle Headlight Work?
A motorcycle headlight uses electrical energy to produce light and an optical system to direct that light onto the road. The light source may be halogen, LED, or HID, while the optical system may use a reflector or projector design.
On a petrol-powered motorcycle, the engine drives an alternator that converts mechanical energy into electrical energy. The charging system replenishes the battery and supplies electrical power, but the headlight’s exact power-supply arrangement varies by model. Check your motorcycle’s owner’s or service manual before changing the lighting system.
If the headlight operates with the engine off, it draws energy from the battery. Leaving it on for an extended period can discharge the battery and leave insufficient power for starting.
Different Motorcycle Headlight Technologies
When comparing headlights, look at two things: how they make light and how they spread it. Halogen, LED, and HID are types of light sources. Reflector and projector refer to how the light is directed, not to different light sources.
Light Sources: Halogen, Led And Hid
1. Halogen Headlights
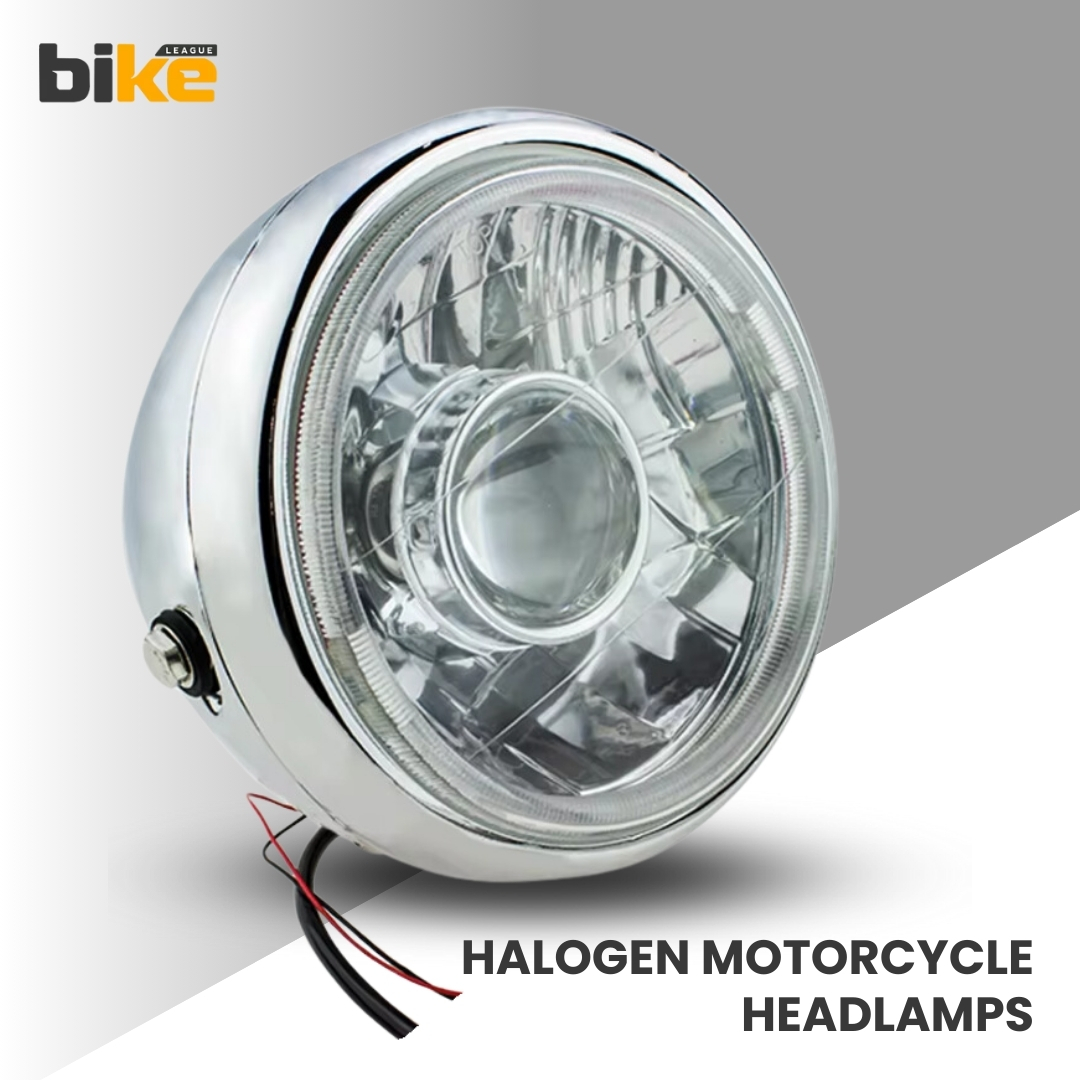
A halogen bulb produces light when electricity heats a tungsten filament inside a glass envelope containing a halogen gas mixture. The halogen cycle helps reduce blackening of the glass during operation.
Halogen bulbs are usually a budget-friendly replacement. But how well they work depends on the bulb type, headlamp design, and electrical supply, not just the use of halogen technology.
Advantages Of Halogen Headlights
- Usually affordable to replace.
- Replacement bulbs are available in established automotive categories.
- Bulb replacement can be straightforward where the motorcycle provides suitable access.
Limitations Of Halogen Headlights
- Generally less energy-efficient than LED lighting.
- The filament wears during use, and service life depends on operating conditions and bulb design.
- Replacement bulbs must match the specified category and wattage.
2. Led Headlights
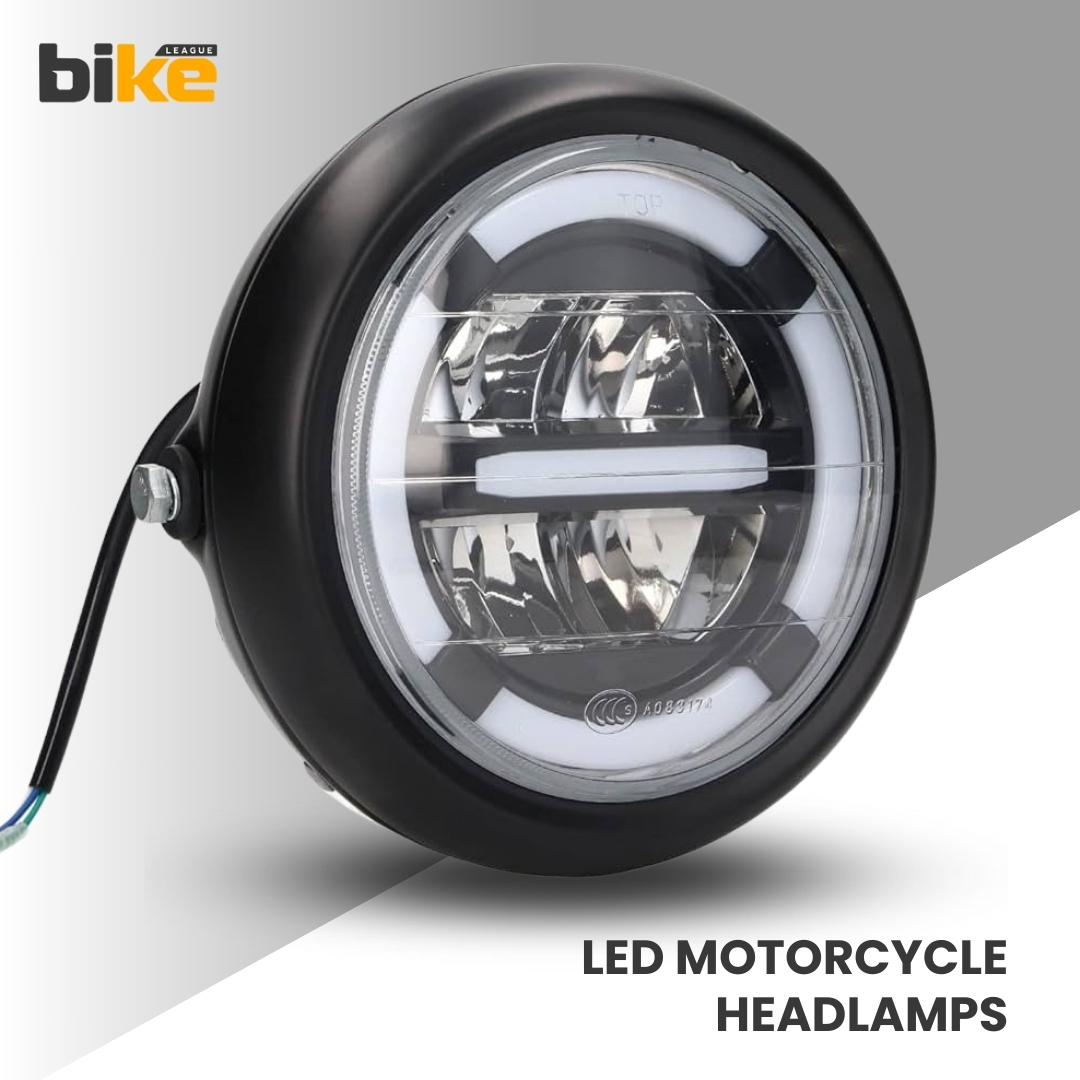
LED stands for light-emitting diode. LEDs are semiconductor devices that emit light when electrical current passes through them. Headlamp systems use electronic control and thermal management to operate the LEDs correctly.
LED lights are energy efficient and can last a long time, but they still create heat that needs to be managed. How well they work depends on the whole headlamp, including electronics, cooling, and optics.
An LED replacement bulb is not always better than the original halogen bulb. Make sure it fits your headlamp and motorcycle, gives a good beam pattern, and meets road-use rules.
Advantages Of Led Headlights
- Good potential energy efficiency.
- Immediate light output without an HID-style warm-up period.
- Potentially long service life with suitable cooling and electrical control.
Limitations Of Led Headlights
- Integrated headlamp assemblies can be expensive to replace.
- Some systems do not provide a separately replaceable light source.
- Retrofit compatibility cannot be established from connector fitment alone.
3. Xenon Hid Headlights
High-intensity discharge (HID) lamps produce light through an electrical arc between electrodes inside a discharge chamber. Unlike halogen bulbs, they do not produce light by heating a filament.
A ballast gives the high voltage needed to start the lamp and controls it while it runs. HID lamps need a moment to reach full brightness. The color depends on the lamp type; HID light is not always blue, softer, or more comfortable.
Advantages Of Hid Headlights
- High light output in a correctly designed headlamp system.
- Can provide greater luminous efficiency than halogen lamps.
Limitations Of Hid Headlights
- Requires a compatible lamp, ballast, and optical system.
- Does not reach full brightness immediately after ignition.
- High ignition voltage requires appropriate servicing precautions.
- An HID conversion is not a simple substitute for a halogen bulb.
Technical reference: HELLA’s guide to automotive lighting principles and light sources.
Optical Designs: Reflector And Projector
1. Reflector Headlamps
A reflector headlamp uses shaped reflective surfaces to collect light from the source and direct it onto the road. Depending on the design, the reflector, outer lens, or both help create the required light distribution.
A reflector does not always cause unfocused light or glare. Well-designed reflector systems control light direction, and some use special shapes to illuminate different parts of the road.
Key considerations include the complete optical design, the correct light source, the condition of the components, and proper alignment. Do not assume that fitting a different bulb technology will preserve the original beam pattern.
2. Projector Headlamps
A projector headlamp uses a compact optical system with a projection lens to direct light onto the road. Many low-beam projector designs use a shield to help form the beam cutoff.
Projector systems may use halogen, HID, or LED light sources, depending on their design. A projector is therefore not an alternative to LED or halogen: it describes how the light is distributed.
Projector designs can give a sharp beam, but they are not always brighter or better than reflector systems. Look at how the whole headlamp performs and fits your needs, not just how it looks.
Technical reference: HELLA’s guide to reflector and projection headlamp systems.
What Is The Difference Between Motorcycle Headlights And Fog Lights?
Headlights provide the motorcycle’s main forward illumination. Front fog lamps have a separate function intended for reduced-visibility conditions. They should not be confused with auxiliary driving lamps designed to supplement high-beam illumination.
These terms describe what a lamp does, not how it produces light. A headlamp or fog lamp may use LED or another light source, depending on its design.
| Lamp function | Main purpose | What to check |
|---|---|---|
| Low-beam headlight | Provides forward road illumination with a controlled light distribution intended to limit glare. | Correct light source, beam pattern, alignment, and applicable requirements. |
| High-beam headlight | Provides additional illumination farther ahead when traffic and lighting conditions permit. | Check for correct operation and timely dipping to avoid dazzling other road users. |
| Front fog lamp | Provides supplementary illumination intended for reduced-visibility conditions. | Documented fog-lamp function, permitted application, installation and aiming requirements. |
| Auxiliary driving lamp | Supplements driving-beam illumination rather than serving the same function as a fog lamp. | Documented lamp function, permitted use, switching and installation requirements. |
Don’t judge a fog lamp just by its colour, shape, or where it’s mounted. A yellow LED pod isn’t always a fog lamp, and even if something is called a “fog light,” you still need proper product documentation.
A supplementary lamp won’t fix a broken main headlight. Before you install one, make sure you know what it’s for and check the Indian rules that apply. This guide doesn’t say how many extra lamps you can use or where to put them.
Technical references: HELLA’s overview of motorcycle lighting functions and HELLA’s explanation of front fog-lamp applications.
Motorcycle Headlight Technology Comparison
| Category | Technology | How it works | Key consideration |
|---|---|---|---|
| Light source | Halogen | Electricity heats a tungsten filament to produce light. | Use the specified bulb category and wattage. |
| Light source | LED | Semiconductors emit light under controlled electrical operation. | Check thermal management, electronics, and optical compatibility. |
| Light source | HID | An electrical arc produces light, with a ballast controlling operation. | Use compatible parts and follow the correct servicing steps. |
| Optical design | Reflector | Reflective surfaces are shaped to spread light onto the road. | The quality of the beam depends on the overall design and using the right light source. |
| Optical design | Projector | A lens focuses and projects the light pattern created by the optical system. | A projector is not always better than a reflector. Always check the whole headlamp. |
Halogen Vs Led Motorcycle Headlights: Brightness, Lifespan And Cost
LED headlights usually use less energy and can last longer than halogen bulbs. But not every aftermarket LED bulb will give you better visibility or last longer in your motorcycle’s headlamp.
Look at the specific products and how they’re installed, not just the type of technology.
| Factor | Halogen | LED |
|---|---|---|
| Brightness and visibility | Assess performance with the specified bulb, correct electrical supply, and properly aligned headlamp. | Can provide effective illumination, but an unsuitable retrofit may not preserve the original beam pattern. |
| Energy efficiency | Generally less efficient; the filament must be heated to produce light. | Generally more efficient, but check the complete product’s documented power consumption. |
| Operating life | Varies with bulb design and operating conditions. Use the exact manufacturer specification. | Generally offers longer potential operating life, but cooling, electronics, and operating conditions affect durability. |
| Heat management | Uses a hot filament and requires the specified bulb wattage and suitable housing. | Still generates heat and requires appropriate thermal management. |
| Replacement and repair | Usually involves replacing the specified bulb where access and the service procedure permit. | May involve a replaceable product, a separate component, or a complete assembly, depending on the design. |
| Cost comparison | Obtain a price for the specified bulb and any installation work. | Check what the price includes; a retrofit bulb and an integrated headlamp assembly are not equivalent purchases. |
Not sure which to pick? If your halogen bulb has failed, start with the replacement recommended by the manufacturer. Only think about switching to a different lighting system after you’ve checked fitment, electrical compatibility, beam performance, and Indian rules.
To judge lifespan, look at the ratings and warranty for each product. Don’t trust broad claims like “all LEDs last 50,000 hours” or “LEDs always last ten times longer.” The rating for the light source doesn’t guarantee the whole assembly will last that long.
Technical references: HELLA’s explanation of LED efficiency, thermal management and service life and HELLA’s explanation of halogen operation and ageing.
What Are The Legal Requirements For Motorcycle Headlights In India?
In India, motorcycle lighting is controlled by the Central Motor Vehicles Rules and the Motor Vehicles (Driving) Regulations. These rules cover both the lights on your bike and how you should use them. When you replace a headlight, check the rules for your specific motorcycle instead of just looking at brightness, wattage, or fit.
1. Automatic Headlamp On (aho) And Daytime Running Lights
Under Rule 105(1)(bb), two-wheelers manufactured on or after 1 April 2017 must have one or two headlamps that meet the applicable performance and installation standards and switch on automatically when the engine is running.
The rule also permits a compliant daytime running lamp (DRL) arrangement to satisfy this automatic-lighting requirement. In that arrangement, the DRL must illuminate automatically when the engine is running and switch off automatically when the engine is running and the headlamp is switched on.
But remember, having this equipment is different from your duty to use lights. Regulation 31 of the Motor Vehicles (Driving) Regulations, 2017 says that two-wheeler riders must use dipped headlights during the day. Don’t think a DRL can replace the main headlight in all situations.
Source: Rule 105(1)(bb), reproduced by Commercial Law Publishers.
2. Headlight Brightness, Colour And Installation
Headlamps must meet official performance and installation rules. Don’t rely on a seller’s claims about lumens, wattage, colour temperature, or a “road-legal” label as proof that it’s legal.
Before you install a new headlight, make sure its light source, beam pattern, colour, and mounting are right for your motorcycle and follow the rules. Don’t add decorative colours or extra lamps unless you know they’re allowed.
3. Aftermarket Led And Hid Replacements
Just because an aftermarket bulb or headlamp fits your connector or housing doesn’t mean it’s legal. Ask the maker or seller for documents that show it’s meant for your bike and meets Indian rules.
Getting a professional to install your headlamp can help with fitting and adjustment, but it doesn’t make it legal by itself. Don’t assume an E-mark or “ARAI-approved” ad means it’s approved for your specific motorcycle and setup. Always check what the approval documents actually cover.
4. Can You Fit Fog Lights Or Auxiliary Lights To A Motorcycle In India?
Front fog lamps are recognised as optional equipment in AIS-009 (Rev.1):2011, the lighting-installation standard for L-category vehicles. However, “optional” equipment in this standard does not mean that every aftermarket installation is automatically permitted. The standard addresses vehicle approval, and the suitability of a particular retrofit must be established separately.
How Many Front Fog Lamps Does The Standard Specify?
Clause 6.10.1 specifies one or two front fog lamps. This is a fog-lamp requirement, not a general allowance for any number of additional LED pods, spotlights, or driving lamps.
Do not add this number to the number of headlamps and assume that having four lights is always legal. Check what each lamp is for and make sure the whole installation meets the rules.
What Colour May Front Fog Lamps Emit?
Clause 5.13 specifies white or selective yellow for front fog lamps. The same clause specifies white for passing-beam and driving-beam headlamps. Therefore, the permitted colour of a fog lamp should not be presented as permission to fit a yellow main headlight.
Where Should The Lamps Be Installed?
The standard has rules for where lamps are placed, how they are lined up, how visible they are, which way they point, and how they are wired. Do not pick a mounting spot just because it is easy or popular with other riders.
Use documentation for the exact lamp and motorcycle, and have the proposed installation checked against the applicable requirements. Do not treat a universal accessory bracket as evidence that its mounting position is compliant.
Are All Auxiliary Led Lights Treated As Fog Lamps?
No. Calling something an “auxiliary LED light” does not clearly describe what it does. Find out if the product is a front fog lamp, a driving-beam lamp, or another type of light before deciding if it is suitable.
Just because a lamp has a yellow lens, is mounted low, or is called a “fog light” by the seller does not mean it meets the rules. Ask what the lamp is approved for and what the documents actually say.
What Should You Check Before Fitting An Aftermarket Lamp?
- The lamp’s documented function and applicable approval information.
- Compatibility with the exact motorcycle model, variant, and year.
- The permitted number, position, visibility and aiming arrangement.
- Electrical compatibility, switching and circuit protection.
- Whether the proposed modification is acceptable under the requirements applicable to the motorcycle.
If the supplier cannot answer these questions, do not assume that having it fitted by a professional or seeing an “ARAI-approved” ad makes it legal. Check with the manufacturer or your transport authority before you go ahead.
Source: AIS-009 (Rev.1):2011 with Amendments 1 and 2, published by MoRTH. Relevant provisions include clauses 2.18, 5.13, 5.15–5.17 and 6.10.
5. Low-beam And High-beam Use
Regulation 31 says you can’t use high beams improperly or for too long, even on well-lit roads. You should dip your beam early when another vehicle is coming toward you or when you’re close behind someone.
So, it’s not just that “high beams are illegal in the city.” Use the right beam for the lighting and traffic, and make sure you don’t blind other drivers.
Keep your lights working well and make sure they aren’t covered by dirt or anything else.
Source: Motor Vehicles (Driving) Regulations, 2017, Regulation 31.
6. Rear Lamps And Registration-plate Illumination
Rule 105(2) says your motorcycle’s rear lamp must show a red light that can be seen from 75 metres away. The rear number plate also needs to be lit with white light so it can be read from 15 metres behind.
Source: Rule 105(2), reproduced by Commercial Law Publishers.
7. Penalties And Compliance Checks
Do not rely on a single fine amount you find online for headlights. Always check the real law and your state or Union Territory’s official notice before mentioning a penalty.
If you’re not sure if a change is allowed, ask your local transport authority before you buy or install it.
How To Choose A Motorcycle Headlight For Indian Roads
The best motorcycle headlight is not always the brightest one you see in ads. First, check that it fits your bike. Then consider how the whole headlamp works, how it is installed, the warranty, and the price. Do not choose a product just because it is called LED, HID, or projector.
1. Check Compatibility Before Buying
Find out your motorcycle’s exact model, version, and year. Look in the owner’s manual or the manufacturer’s parts info to see which bulb or headlamp assembly you need.
- Confirm whether the motorcycle uses a replaceable bulb or an integrated headlamp assembly.
- Check the specified bulb category, voltage, and wattage where applicable.
- Confirm the connector, mounting points, housing depth, and available clearance.
- For an LED replacement, check clearance for cooling components and the original dust cap.
- Verify electrical compatibility using the motorcycle and replacement manufacturer’s documentation.
- Check that the installation preserves the intended sealing, ventilation, and adjustment range.
- Request documentation covering the intended application and applicable Indian requirements.
Just because a connector matches or the size looks right doesn’t mean it will fit properly. Don’t buy products unless you can confirm they fit your motorcycle.
2. Match Beam Performance To Your Riding Conditions
Think about where and how you usually ride when deciding what kind of headlight performance you need. Don’t assume one type of lighting is best for every road.
- City riding: Assess low-beam coverage and correct alignment. Avoid choosing a replacement solely for maximum brightness.
- Rural riding: Look for useful road coverage and adequate illumination ahead. Do not assume that combining LED low beams with HID high beams is a suitable upgrade for your motorcycle.
- Highway riding: Compare both low- and high-beam performance. Do not choose HID, LED, or a projector solely because it’s assumed to provide a longer usable beam.
- Mixed riding: Prioritise a compatible system that meets your everyday needs and has dependable service and replacement support.
If performance matters to you, ask for test results for the whole headlamp. Don’t just trust photos or ads.p>
3. Compare Beam Performance, Not Just Advertised Lumens
Lumens show how much total light is produced. Lux tells you how much light actually hits a surface. More lumens alone don’t mean a headlamp lights up the road better.
Before comparing advertised figures, check:
- Whether the output is quoted for one lamp or a pair.
- Whether it describes the light source or the complete headlamp.
- Whether beam measurements were taken at the same distances and under comparable conditions.
- Whether the supplier provides information about light distribution, rather than only total output.
Don’t think that a sharp cutoff or a high lumen number means your headlamp setup is legal for Indian roads.
Technical reference: HELLA’s explanation of lumens, lux and other lighting measurements.
4. Consider Poor-weather Performance
Do not choose a headlight for rain or fog based on colour temperature alone. A “3000K” or “fog-penetrating” label does not, by itself, establish better visibility.
Check what the lamp is meant for, how its beam is spread, and if it meets the rules. If a seller says it works better in rain or fog, ask for test results instead of just trusting the colour label.
5. Compare The Complete Replacement Cost
Compare similar products with each other. A replacement bulb, a full LED headlamp, and a conversion kit are all different, so don’t compare them as if they’re the same.
Ask for an itemised quotation covering the product, any required additional components, installation, and beam adjustment. Check whether future repairs involve replacing a bulb, a separate component, or the complete assembly.
When considering power consumption and lifespan, check the specific product details instead of relying on general statements about all LED, HID, or halogen products.
6. Check Warranty, Support And Replacement Availability
Choose a supplier that provides clear fitment details, installation instructions, warranty information, and a return policy. Before buying an unfamiliar assembly or conversion kit, make sure replacement parts are available.
If your motorcycle is still under warranty, check with the manufacturer or authorised service centre to see how the modification might affect your coverage. Also, ask your insurer about any disclosure requirements and review the legal section above for compliance.
Motorcycle Headlight Lifespan And Replacement Costs
Before you compare prices or lifespan claims, make sure you know exactly what you’re buying. A replacement bulb, HID ballast, conversion kit, and complete headlamp assembly are all different. Compare products that fit your motorcycle and cover the same replacement needs.
1. Check Product-specific Lifespan Claims
Don’t assume all halogen, LED, or HID products last the same amount of time. Look at the manufacturer’s exact specifications and note any details like “up to” a certain number of operating hours.
Operating hours aren’t the same as calendar years. To convert hours to years, you need to know the daily usage, and this shouldn’t be taken as a guaranteed service life.
Remember, the stated operating life of the light source is different from the service life of the whole headlamp. Don’t use a general lifespan estimate as your automatic replacement schedule.
2. Identify What Needs Replacing
Look up your motorcycle’s parts information or get a workshop diagnosis before comparing quotes. Find out if you need to replace just a bulb, a separate electrical part, or the whole assembly.
- Halogen: Confirm the specified bulb category and wattage, and whether the quotation covers only the bulb.
- LED: Establish whether the light source or another component is separately replaceable, or whether the complete assembly is required.
- HID: Confirm whether the quotation covers the discharge lamp, ballast, or a larger set of components.
- Complete headlamp: Check the part number, exact motorcycle fitment, and which components are included.
Reflector and projector refer to optical designs, not specific replacement packages. Don’t give them a universal lifespan or compare their prices directly with bulbs or complete assemblies.
3. Compare The Complete Installed Cost
Request an itemised quote instead of just looking at the main price. Check the product quantity, included parts, taxes, and any delivery fees.
If needed, ask for installation, extra parts, and beam adjustment to be listed separately. Don’t assume every replacement needs extra wiring, adaptors, or other accessories.
When comparing prices online, note the exact product, seller, and the date you checked. Don’t use a general marketplace listing as proof of replacement cost for all motorcycles.
4. Check Warranty And Future Repair Costs
Check the warranty coverage on its own, separate from the stated operating life. Make sure you understand the terms for your product and market, including any exclusions, registration steps, and how to make a claim.
Find out what would need to be replaced if a part fails later and whether you can get replacement parts. Don’t assume a more expensive product is always cheaper to own, or that a lower price means the lowest total cost.
For cleaning, checking for condensation, and adjusting the beam, follow the maintenance section and your motorcycle’s service guide. Don’t include set schedules for polishing, resealing, or changing bulbs in your cost comparison.
What To Include In A Headlight Replacement Quotation
| Item | What to confirm |
|---|---|
| Product identification | Brand, exact product or part number, and documented motorcycle fitment. |
| Replacement scope | Whether the quotation covers a bulb, separate component, kit, or complete assembly. |
| Included components | Any supplied driver, ballast, brackets, adaptors, or other parts. |
| Product price | Price, quantity, date quoted, taxes and delivery charges. |
| Installation | Labour, any required additional parts, and beam adjustment. |
| Lifespan claim | The exact manufacturer statement and its qualifications. |
| Warranty and repair support | Applicable coverage, exclusions, claim procedure, and replacement-part availability. |
Examples Of Motorcycle Headlight Replacement Prices
The examples below show why you should price a replacement bulb and a headlamp assembly separately. These are selected listings from Hero MotoCorp’s official parts store, not a full market price range or a recommendation for aftermarket upgrades.
Prices were checked on 13 November 2026 and include taxes. Before you order, confirm the current price, delivery charges, installation cost, and that the part fits your vehicle.
| Replacement item | Part number | Listed application | Listed price | Compatibility check |
|---|---|---|---|---|
| Headlight bulb, one piece | 34901MJ6732S | The listing names several Hero model families, including HF, Splendor, Passion, and Glamour. | ₹130 | Confirm the exact bulb specification and part number for your motorcycle. The broad model list is not proof of fitment for every variant or year. |
| Headlight assembly without bulb, one piece | 3310BAAH10099S | CD Deluxe, HF 100, HF Deluxe and HF Deluxe Eco. | ₹615 | Match the part number through the manufacturer’s vehicle-compatibility information or an authorised dealer. |
| Headlight assembly without bulb, one unit | 3310AAANH02S | Glamour. | ₹830 | Confirm the exact Glamour variant and manufacturing year before purchase. |
Sources: Hero MotoCorp’s listings for bulb 34901MJ6732S, assembly 3310BAAH10099S and assembly 3310AAANH02S.
These are examples for parts only, not fitted quotations. The two assemblies are listed without bulbs, so don’t assume a bulb or other extra parts are included. Ask the workshop what can be reused and request separate quotes for any needed parts, labour, and beam adjustment.
If you want an aftermarket LED bulb or projector kit, ask for fitment and compliance documents specific to your motorcycle. These OEM replacement examples do not mean that an aftermarket conversion is suitable or allowed.
Electrical Compatibility Before A Motorcycle Headlight Upgrade
Your new headlight needs to match your motorcycle’s electrical system and housing. Just because a product advertises lower wattage doesn’t mean you’ll get better charging, longer battery life, or a cooler regulator. Always check the original specs and the replacement manufacturer’s instructions before making changes.
1. Compare The Actual Power Specifications
Check your motorcycle’s owner’s manual or service manual to find the original bulb or headlamp specs. Compare these with the replacement’s listed electrical input, rather than relying on general wattage numbers for LED, HID, or halogen lights.
- Check whether the stated power consumption applies to one lamp, a pair, or the complete assembly.
- Confirm whether low and high beams have different power requirements.
- Check the requirements of any supplied driver, ballast, or controller.
- Do not assume that every LED replacement consumes less power than the original lamp.
Reflector and projector refer to optical designs, not specific categories for electrical use. Look at the stated input for the whole lighting system instead of judging by housing type.
2. Understand The Limits Of Lower-wattage Claims
A replacement that uses less electricity lowers the lamp’s demand, but how it affects your motorcycle’s charging system depends on how the alternator and regulator or rectifier work.
Motorcycles have different regulator designs. Some control charging by shorting the generator output, while others open the generator circuit in certain situations. So, using a headlamp that consumes less power doesn’t always mean the alternator will have less load or the regulator will run cooler.
Don’t install an LED to fix overheating, charging voltage issues, or repeated battery problems. Instead, have the real problem checked using your motorcycle’s service information.
Technical reference: Shindengen’s explanation of motorcycle regulator/rectifier designs.
3. Check The Headlight Supply And Control Arrangement
Don’t assume every motorcycle powers its headlight directly from the battery or uses the same electrical setup. Some systems combine generator output, regulation, and special lighting controls.
LEDs need controlled current. Depending on the design, this control might come from a separate driver or be built into other parts. Just because a connector fits doesn’t mean the replacement works with your motorcycle’s supply or control system.
- Confirm the required voltage and whether the replacement supports the motorcycle’s AC or DC supply arrangement.
- Check any driver, ballast, controller, or adaptor requirements.
- Confirm correct low-beam and high-beam operation.
- Check compatibility with the factory automatic-lighting arrangement.
- Follow application-specific instructions for any lamp monitoring or diagnostic functions.
Just having an H4 or HS1 fitment description isn’t enough to prove electrical compatibility.
Technical reference: Shindengen’s explanation of motorcycle LED headlamp control.
4. Do Not Treat An Upgrade As A Battery Repair
Don’t expect an LED conversion to automatically extend battery life, stabilise charging voltage, or stop flickering. These results depend on your current system, its condition, and whether the replacement is suitable.
If you see dimming, flickering, or weak starting, get the cause checked before buying a new headlight. Let the technician know if the problem started before or after you changed the lighting.
If your motorcycle lets you use the headlight when the engine is off, try not to leave it on when you don’t need it. Even a low-power lamp will drain the battery.
5. Follow Application-specific Wiring Instructions
Don’t assume that every bulb replacement works without extra parts, or that every projector upgrade needs a relay. What you need depends on your motorcycle and the new system.
Only use the parts and wiring setup recommended for your installation. Don’t add relays, resistors, or adaptors just because they’re sold as upgrades.
- Do not bypass a fuse or increase its rating to accommodate an unsuitable replacement.
- Have any additional wiring, circuit protection, and connections checked by a qualified technician.
- Avoid unsupported wiring modifications that prevent the original lighting controls from working correctly.
- After installation, verify the lighting functions, beam adjustment, and any dashboard warnings.
Even if a professional installs your headlight, you still need to make sure the parts are compatible and you have the right compliance documents.
Electrical Checks Before Installation
| Check | What to confirm |
|---|---|
| Original specification | The specified bulb category or assembly part number and electrical requirements. |
| Replacement input | Documented voltage, power consumption, and supported supply arrangement. |
| Control components | Any required driver, ballast, controller, or adaptor. |
| Wiring and protection | Application-specific installation instructions, suitable connections and circuit protection. |
| Lighting operation | Correct low beam, high beam, automatic lighting operation, and any diagnostic functions. |
| Existing faults | Dimming, flickering, or charging problems have been investigated before modification. |
Motorcycle Headlight Maintenance And Troubleshooting
When maintaining your headlight, keep the lens clean, make sure it works properly, and check the beam alignment. Always follow your motorcycle’s manual instead of using a one-size-fits-all cleaning or replacement routine.
1. Clean The External Lens Carefully
Let the headlamp cool down before you clean it. Use a cleaner that’s right for the lens material and coating, and follow the manufacturer’s instructions.
Brush off any loose dirt before wiping, and use a clean, soft cloth as recommended. Don’t rub a dusty plastic lens with a dry cloth, since that can scratch it.
Don’t use household products like toothpaste, baking soda, metal polish, or WD-40 unless the headlamp manufacturer says it’s okay. The wrong chemicals or rough cleaning can damage plastic lenses or their coatings.
If your lens looks cloudy or yellow, check if it’s caused by outside wear, something inside, or moisture. Pick a restoration method only if it matches the lens material and coating. Don’t polish a clear lens just because a certain amount of time has passed.
Technical reference: HELLA’s precautions for cleaning plastic headlamp lenses.
2. Avoid Unnecessary Internal Cleaning
Don’t open the headlamp to clean the reflector or polish the inside lens as part of regular maintenance. Always follow the service instructions for your specific headlamp.
If you see dirt inside, damaged reflective surfaces, or loose parts, get the problem checked before taking anything apart. Don’t use cleaning products inside the lamp unless there’s an approved method.
3. Check Persistent Condensation Or Water Ingress
A thin mist inside the headlamp can show up after rain, washing, or changes in temperature or humidity. This doesn’t always mean the headlamp is broken.
If you see ongoing condensation or water building up inside, get it checked out. Have the cover caps, vents, housing, and connections inspected as the manufacturer recommends.
Don’t block the vents, add makeshift drying materials, or use extra sealant as a regular fix. Headlamps don’t need to be resealed every year by default.
Technical reference: HELLA’s explanation of temporary condensation and signs requiring inspection.
4. Adjust The Beam Using The Specified Procedure
Adjust your headlight by following the steps in your motorcycle’s manual. Make sure to use the right surface, tire pressures, loading, measurement distance, and aiming points as specified.
Don’t adjust the beam based on your eye level or assume that a standard five-metre or 25-foot wall test works for all motorcycles. The right adjustment depends on your bike’s specific beam angle and setup.
Get the alignment checked after any work that might move the headlamp. If you’re not sure how to adjust it, go to a qualified workshop instead of guessing.
Technical reference: HELLA’s explanation of headlamp preparation and beam-inclination principles. Use your motorcycle manufacturer’s instructions for the actual settings.
5. Handle Replacement Bulbs Correctly
Use the recommended replacement bulb and follow your motorcycle’s instructions for changing it. Turn off the lights and let any hot parts cool before you touch them.
When installing a halogen bulb, don’t touch the glass with your bare fingers. If you do, clean it as the bulb manufacturer recommends.
Put covers and seals back on properly. Don’t replace bulbs just because of a general lifespan estimate—follow the product’s specific advice and check for any changes in how it works.
If you have an HID system, don’t work on the ballast or ignition circuit unless you have the right training and follow the service procedure.
6. Follow Led Cooling-maintenance Instructions
If your LED system has cooling parts you can reach, only check or clean them as the manufacturer says. Don’t take apart a sealed unit or remove covers to get to an internal heat sink.
If your LED headlamp flickers,turns off, or gets much dimmer, have it checked out. Don’t just assume cleaning off dust or using a brighter bulb will fix it.p>
7. Troubleshoot Common Motorcycle Headlight Problems
Begin by noting the symptom and when it happens. A failed light does not always mean the bulb, battery, or alternator needs to be replaced. Use the observations below to help with inspection, but do not treat them as a final diagnosis.
| Symptom | What to observe | Next step |
|---|---|---|
| Neither low nor high beam works | Check the normal operating conditions in the owner’s manual. Note whether other lights or electrical functions also fail. | Have the light source, relevant fuse, connections, supply, and control system checked. Do not assume both beams have failed for the same reason. |
| Only one beam works | Identify whether the low beam or high beam is affected and whether the fault is constant or intermittent. | Identify the headlamp design before testing. Have the affected light source or function and its circuit checked using the service information. |
| Flickering began after a replacement | Record the replacement product and whether the problem occurs on one or both beam settings. | Have the installer verify fitment, connections, electrical compatibility, and any driver or adaptor requirements. Do not add resistors or alter wiring by guesswork. |
| Flickering occurs over bumps | Note whether vibration consistently triggers the fault and whether other electrical functions are affected. | Have the mounting, bulb retention, connectors, and wiring inspected. Do not pull or move live wiring to reproduce the fault. |
| Brightness changes with engine speed | Note the operating conditions and whether the behaviour is new or has changed after a modification. | Check the motorcycle’s specified lighting arrangement. Compare the supply and charging behaviour with manufacturer specifications before replacing components. |
| The headlight has gradually become less effective | Look for external dirt, cloudiness, damage, or a change in beam position. | Clean the external lens as instructed, then have alignment, light-source condition and electrical supply assessed if the problem remains. |
| Other drivers flash their lights after an upgrade | Record whether this began after a bulb, assembly, or mounting change. | Have beam selection, bulb seating, compatibility and alignment checked. Do not assume the installation is correct simply because it appears brighter. |
| Moisture appears inside the lamp | Distinguish temporary light misting from persistent condensation, droplets, or pooled water. | For persistent moisture or water accumulation, have caps, ventilation, seals, and housing inspected. Do not apply extra sealant or block vents as a routine fix. |
Follow your motorcycle’s service information for electrical measurements and component tests. Do not bypass a fuse, use a higher-rated fuse, or take apart a sealed lamp while troubleshooting.
If you notice melted connectors, damaged wiring, a burning smell, or fuses that keep failing, stop using that system and get it checked by a professional. Do not keep riding if your lights do not work or if you cannot see well.
Technical references: HELLA’s systematic approach to LED headlamp fault diagnosis and HELLA’s explanation of temporary misting and persistent moisture. Follow your motorcycle manufacturer’s instructions for specific tests and repairs.
8. How Can I Tell Whether My Motorcycle Headlight Bulb Has Blown?
If your headlight does not turn on, the bulb might have failed, but this is not always the cause. You may also need to check the fuse, connections, switch, electrical supply, or lighting control.
- Check the normal operating conditions: Follow the owner’s manual to establish when the headlight should illuminate. Do not assume that a headlight remaining off with the engine stopped means the bulb has failed.
- Check both beam settings: Note whether low beam, high beam, or both have stopped working. This information helps diagnosis, but does not identify the faulty component by itself.
- Identify the lighting system: Establish whether the motorcycle has a replaceable halogen bulb, an integrated LED assembly, or another arrangement before attempting inspection.
- Inspect only where the manual permits: Switch off the lighting system and allow it to cool. If the manual permits bulb removal, follow its procedure. A visibly broken halogen filament indicates failure, but an intact-looking bulb does not prove that it works correctly.
- Seek further diagnosis if the cause is unclear: Have the bulb and its supply checked using the motorcycle’s service information rather than replacing unrelated components by guesswork.
If you have an integrated LED headlamp, do not try to find a replaceable filament bulb or open the sealed assembly. Follow the manufacturer’s instructions for diagnosis and repair. HID systems also need special care because of their high-voltage parts.
Do not bypass a fuse or use a higher-rated fuse to fix the light. If a new fuse blows again, have the electrical problem checked.
Technical reference: HELLA’s guidance on bulb deterioration and replacement. Use your motorcycle’s manual for access, fuse, and testing procedures.
9. Can I Replace A Motorcycle Headlight Bulb At Home?
You can often replace a regular headlight bulb at home if your motorcycle’s manual gives instructions and you have the right tools and access. Do not assume these steps work for an integrated LED headlamp or HID system.
The steps below are a general guide and do not replace your motorcycle’s specific replacement instructions.
- Confirm the replacement specification: Check the exact bulb category, voltage, and wattage in the owner’s manual or manufacturer’s parts information. Do not select a replacement solely because its connector looks similar.
- Prepare the motorcycle: Park securely on level ground, switch off the ignition and lighting, and allow the headlamp to cool. Follow any additional electrical-isolation instructions in the manual.
- Access the bulb as instructed: Depending on the motorcycle, access may require removing a cover, headlamp rim, or other components. Do not force panels or pull on wiring.
- Release the connector and retaining mechanism: Follow the specified sequence for the connector, dust cover, and bulb retainer. Retainers differ, so do not assume every bulb twists out.
- Install the specified bulb: Handle a halogen bulb by its base and avoid touching the glass. Seat it in the correct orientation and secure the retainer without forcing it.
- Reassemble carefully: Reconnect the plug and refit all covers, seals, and removed parts according to the manual. Make sure wiring is not trapped.
- Check operation and alignment: Test low and high beams under the motorcycle’s normal operating conditions. Confirm that the bulb is correctly seated and check beam alignment using the manufacturer’s procedure.
Stop if you find a melted connector, damaged wiring, a bulb that will not fit properly, or if a new fuse blows. These problems need to be diagnosed instead of just changing the bulb again.
For an integrated LED headlamp, see if any part can be serviced on its own. Do not open a sealed assembly to look for a regular bulb. Leave HID ballast and ignition circuit repairs to a qualified technician.
Manufacturer references: Hero Glamour owner’s manual and Hero Xtreme 160R 4V owner’s manual. Use the manual for your exact motorcycle, variant, and year.
Frequently Asked Questions About Motorcycle Headlights
1. Are Motorcycle Headlights Always On?
Motorcycles can have different headlight setups. Rule 105(1)(bb) says that two-wheelers made on or after 1 April 2017 must have automatic headlamps, but a compliant daytime running lamp (DRL) can also meet this requirement.
Regulation 31 of the Motor Vehicles (Driving) Regulations, 2017 also says that two-wheeler riders must use dipped headlights during the day. Remember, DRLs and main headlights have different purposes, and having the right equipment doesn’t remove your responsibility to use the correct lights.
2. Are 6000k Led Motorcycle Headlights Legal In India?
A “6000K” label by itself doesn’t mean an LED headlight is legal for use on Indian roads. Kelvin only tells you the light’s colour temperature, not whether it’s approved, how bright it is, or if it fits your motorcycle.
AIS-009 (Rev.1):2011 says passing-beam and driving-beam headlamps must use white light. But even if a product is called “6000K white,” it still has to meet all the colour, performance, and installation rules.
Before fitting a replacement, check:
- Documented compatibility with your motorcycle and headlamp.
- Evidence covering the applicable Indian requirements for the intended installation.
- The completed installation’s beam pattern and alignment.
- Electrical compatibility and any required control components.
Don’t think a matching connector, an E-mark, or a seller’s “road-legal” claim means the headlight is actually approved for your motorcycle. Also, not every 6000K headlamp is banned just because of its colour temperature.
Source: AIS-009 (Rev.1):2011 with Amendments 1 and 2, clauses 2.21 and 5.13, published by MoRTH. Confirm the version and requirements applicable to your motorcycle before modifying its lighting.
3. How Do I Check Motorcycle Headlight Size And Fitment?
Begin by finding the manufacturer’s part number or checking what fits your motorcycle’s exact model, variant, and year. If you need to measure, look at the size, housing depth, mounting points, and how much space you have.
Also check the connector, electrical specs, sealing, and how the headlight adjusts. Just measuring from rim to rim isn’t enough to make sure it fits.
4. How Can I Improve A Dim Motorcycle Headlight?
Find out why the bulb needs replacing before you fit a new one. Look for dirt or damage on the lens and see if the beam needs adjusting. If you suspect electrical issues, use your motorcycle’s service information to check them.
If you need to replace the bulb, choose one that fits your motorcycle, then check how the beam works after installation. Make sure you have the right compliance documents. Remember, a higher lumen number doesn’t always mean you’ll see better on the road.
5. How Do I Adjust A Motorcycle Headlight?
Use your motorcycle’s owner’s or service manual to find the right setup, measurement distance, and aiming point. Don’t aim the beam based on your eye level or assume that the same wall-test distance works for all motorcycles.
If you’re not sure how to adjust the headlight or can’t find the adjustment mechanism, ask a qualified workshop to check the alignment for you.
6. Why Does My Motorcycle Headlight Flicker?
There are a few reasons why headlights flicker. Pay attention to when it happens—like at idle, while riding, over bumps, or after you’ve changed the lighting—and tell the workshop what you notice.
Ask the workshop to check the bulb, electrical supply, connections, and any driver or ballast using your motorcycle’s service information. Don’t replace the battery or alternator just because the headlight flickers.
7. How Should I Clean A Motorcycle Headlight Lens?
Use the cleaning instructions from the manufacturer and pick a cleaner that’s safe for your lens material and coating. Brush off loose dirt before wiping, and don’t rub a dusty plastic lens with a dry cloth.
Don’t use toothpaste, metal polish, abrasive pads, or household solvents on your lens. If the lens looks cloudy, figure out if it’s from outside wear, something inside, or moisture before you try to fix it.
8. Which Motorcycle Headlight Lasts The Longest?
No single lifespan applies to every product in a lighting technology. Compare the manufacturer’s operating-life specs for the exact products that fit your motorcycle.
Check the conditions and warranty separately. Don’t assume a light-source rating guarantees the whole assembly’s life, or use a general lifespan as a required replacement time.
9. How Much Should I Budget For A Motorcycle Headlight Replacement?
Start by figuring out if you need just a new bulb, a separate part, or the whole headlamp assembly. Get a quote for your specific model that breaks down the price for the product, any extra parts, installation, and beam adjustment.
Compare quotes that cover the same type of replacement, and look at the warranty and future repair options. Remember, the price for just a bulb isn’t the same as the cost for a whole assembly or a conversion.
10. What Are The Three Main Motorcycle Headlight Light-source Technologies?
This guide covers three light-source technologies: halogen, LED, and HID. Halogen bulbs make light with a heated filament, LEDs use semiconductors, and HID lamps use an electrical arc controlled by a ballast.
Reflector and projector refer to how the headlamp directs light, not how it makes light. Don’t compare them as separate light-source technologies.
11. Why Do Some Motorcycles Have Only One Headlight?
Motorcycle headlamp setups can be different. One headlamp can give both low and high beams, so you don’t always need two. For example, an H4 halogen bulb has separate filaments for low and high beam in one bulb.
Some motorcycles use more than one lamp or have separate lighting functions. Rule 105(1)(bb) allows one or two headlamps for the two-wheelers it covers, but it doesn’t mean every motorcycle must have only one.
If one lamp on a twin-headlamp motorcycle stays off, check the owner’s manual before thinking it’s broken. Find out which lamps should work on each setting instead of guessing by how it looks.
References: HELLA’s explanation of light sources and H4 dual-filament bulbs and Rule 105(1)(bb), reproduced by Commercial Law Publishers.
Related Motorcycle Guides
- AHO in bikes: Rules, working and battery impact
- Motorcycle battery types and maintenance
- Monsoon motorcycle riding safety tips
- Bike maintenance at home
- Essential motorcycle accessories for riders
Conclusion
Begin by checking your motorcycle’s specifications, figure out what needs to be replaced, and compare products with clear information. Make sure the product fits and meets your requirements, and check the cost and repair support before you decide.
Always follow the manufacturer’s instructions for cleaning and adjusting your headlight, and check for any issues before you buy an upgrade.
If you have any questions or feedback about this guide, please leave a comment below or email bikeleagueindia@gmail.com.