Long story short: Learn the complete process & methods for buffing motorcycle engine and other chrome parts for a showroom‑ready shine. Step‑by‑step tips, tool picks, and finish‑protecting tricks.
Buffing your motorcycle’s engine and chrome parts does more than make it look great. It helps protect your investment and keeps your bike looking impressive. Weather and road conditions can dull chrome over time, but with the right tools and techniques, you can restore and keep that bright, showroom finish at home.
This guide covers everything you need to know, from buffing basics and essential tools to proven methods and expert tips. With these steps, you can keep every chrome detail on your motorcycle shining.
Key Takeaways
- Buffing your motorcycle engine and chrome parts preserves their shine and protects against rust and Corrosion.
- Use the correct combination of compounds, buffing wheels, and protective gear for best results and safety.
- Different buffing methods—metal polish, cream, foil, and compound bars—suit different parts and levels of oxidation.
- Routine, home-based buffing is effective for regular upkeep, but professional services give a flawless, show-ready finish for deep restoration.
- Sealing the finish after buffing with wax or clear coat extends the life of your polish and protects against future damage.
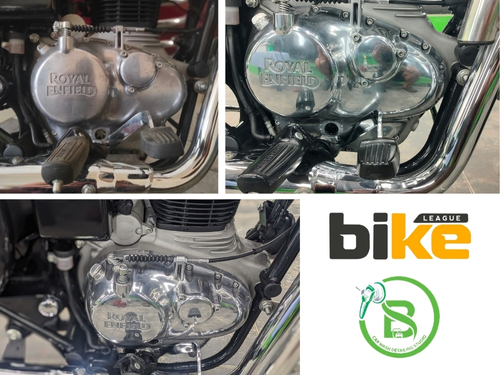
What Is Buffing In Motorcycles?
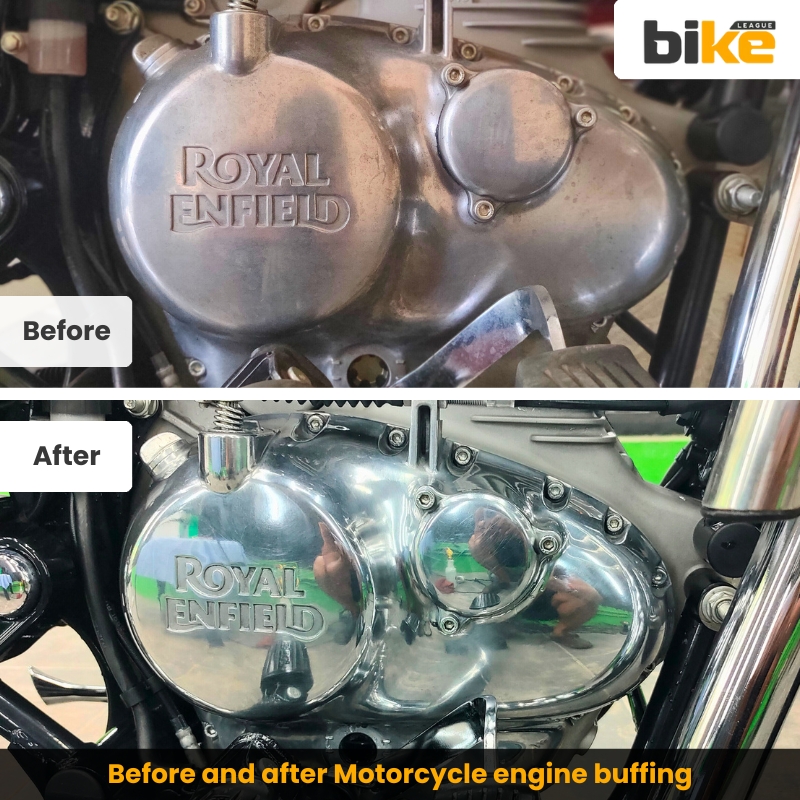
Buffing a motorcycle involves polishing metal parts like chrome fenders, engine cases, exhaust pipes, and rims. You can use abrasive compounds with a buffing wheel or polish by hand to restore their shine. This process removes fine scratches, oxidation, and dullness, leaving a smooth, mirror-like finish.
What Are The Common Parts On A Motorcycle For Buffing?
- Engine Cases & Covers (aluminum or polished chrome)
- Exhaust Pipes (especially bare stainless or chrome)
- Wheels & Rims (cast aluminium or chrome‑plated)
- Fenders & Fork Legs (chrome‑plated steel)
What Specific Tools Are Needed For Buffing A Motorcycle Engine?
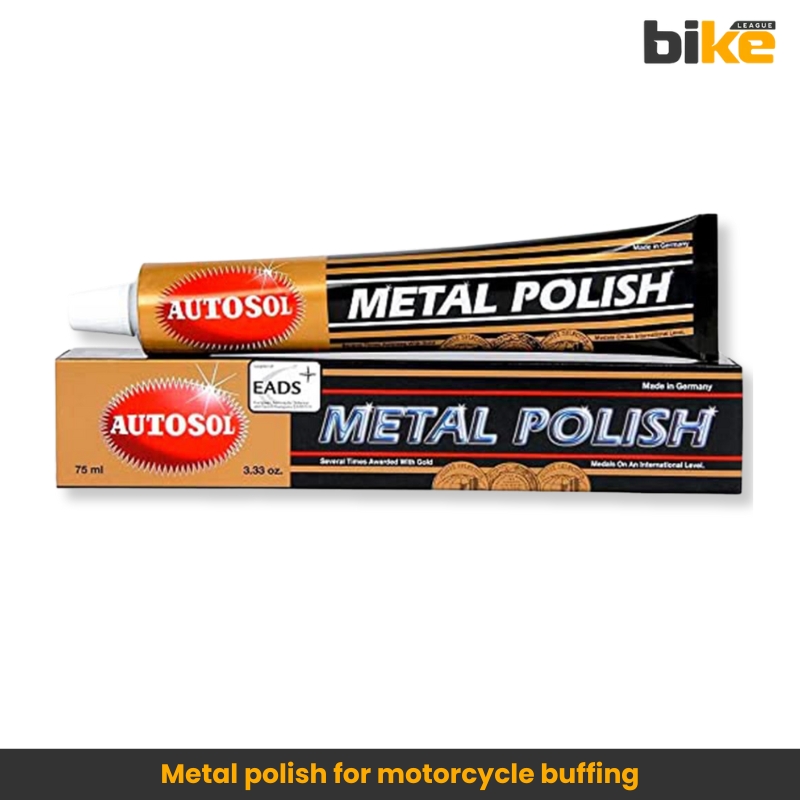
1. Polishing/buffing Compounds
- Start with a medium‑cut chrome polish (e.g., jeweller’s rouge or Autosol)
- Follow up with a fine‑cut finishing polish for mirror shine
2. Buffing Wheels & Pads
- Handheld drill‑mounted wheels : Large cotton wheels for broad surfaces
- Small spindle wheels or tapered cones for tight spots
3. Applicators & Cloths
- Soft microfiber towels for wiping and final buff
- Foam or felt pads for hand‑polishing
4. Mounting Hardware (for Drill Wheels)
- 1/8″ or 1/4″ hex shank mandrels to fit your drill
5. Protective Gear
- Safety glasses or face shield
- Nitrile gloves (to keep oils off chrome and protect your skin)
- Dust mask (if you’re using powders or gritty compounds)
What Are The Different Methods For Buffing A Motorcycle Engine?
1. Metal Polish (paste/liquid)
A concentrated abrasive compound in paste or liquid form designed to aggressively remove rust, oxidation, and deep scratches from metal surfaces.
How To Use
1. Prep & Clean
- Wash the entire bike with a proper professional bike wash shampoo.
- Dry thoroughly; oil, wax, or dirt will clog the abrasive.
2. Stage 1 – Heavy Cut (if Needed)
- Apply a small pea‑size drop of coarse polish to a wool or stiff cotton buff.
- Buff at 1,200–1,500 RPM, holding the wheel flush against the metal and moving continuously to avoid heat spots.
- Wipe residue with a clean microfiber towel.
3. Stage 2 – Medium Cut
- Switch to a medium‑cut polish (e.g., Flitz Paste) on a soft cotton wheel.
- Apply polish sparingly—too much hampers cutting action.
- Buff at 1,200 RPM until a uniform matte shine appears.
4. Stage 3 – Final Shine
- Use an ultra‑fine liquid polish (e.g., Simichrome) on a foam or soft cotton bonnet.
- Buff at 1,500–1,800 RPM for a mirror finish.
- Wipe with a fresh microfiber to remove any haze.
5. Seal (optional But Recommended)
- Apply a thin layer of paste wax or clear‑coat sealant by hand to lock in the shine.
Pros
- Powerful Cutting Action: Quickly strips heavy rust and deep oxidation
- Covers Big Areas: One container can treat large panels or multiple parts
- Variable Grades: Available in coarse, medium, or fine to match the job
Cons
- Runs & Drips: Harder to control on vertical or curved surfaces
- Scratch Risk: Coarse formulas can create micro‑scratches if misused
- Messy Cleanup: May leave streaks or require a second wipe with solvent or water
2. Metal Polishing Cream
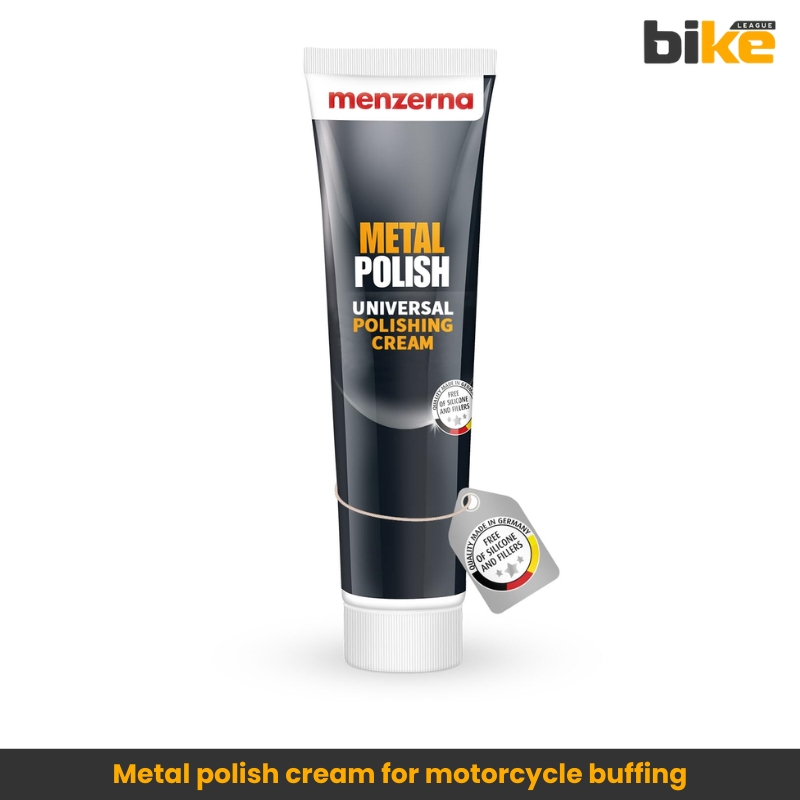
This is a milder, lotion‑like formulation with finer abrasives suspended in a slick, emollient base. It gently cleans and shines without dripping, ideal for regular upkeep.
How To Use
Prep & Clean
- Wash the entire bike with a proper professional bike wash shampoo.
- Dry thoroughly; oil, wax, or dirt will clog the abrasive.
Single‑step Or Two‑step Process
Option A (one‑step):
- Apply a ribbon of cream (e.g., Mother’s Mag & Aluminum Polish Paste) directly to a soft cotton or foam pad
- Buff at 1,200–1,500 RPM, working in overlapping passes until a bright sheen emerges
Option B (two‑step — For Deeper Defects):
- First Pass: Remove oxidation using a medium‑cut cream on a cotton wheel
- Second Pass: Switch to a fine‑grade cream (some brands include both in one jar, so use the final residue) on a soft bonnet for gloss
Cleanup & Seal
- Wipe excess cream with a microfiber
- Optionally buff by hand with a clean rag to burnish any leftover micro‑waxes
Pros
- Non‑Drip Formula: Stays where you apply it—perfect for tight nooks and vertical pipes
- Gentle on Surfaces: Lower chance of introducing new scratches on softer alloys
- Easy Wipe‑Off: Buffs away cleanly with minimal residue if removed promptly
Cons
- Less Aggressive: Not suitable for heavy rust or deep pitting
- Smaller Coverage: Tubes last a shorter time on large surfaces
- May Need Follow‑Up: Sometimes, it needs a protective wax or sealant to lock in shine
| Product | Description | Best For on a Motorcycle |
|---|---|---|
| Metal Polish | Thick paste or runny liquid with strong abrasive action. | Large chrome pipes & fenders, Deep pitting or heavy rust removal |
| Polishing Cream | Creamy lotion with fine abrasives and added lubrication. | Curved exhausts & wheel spokes, Small bolts, emblems, and trim |
Difference Between Metal Polish And Metal Polish Cream For Motorcycles
To keep your bike’s metal parts shiny, you can use traditional metal polish (paste or liquid) or metal polish cream. Each type works best for different jobs. Here’s a comparison for motorcycle use:
| Use Case | Paste/Liquid Polish | Polish Cream |
|---|---|---|
| Big, flat surfaces | Good for fenders, large pipes | Might be too mild |
| Deep rust/oxidation | Cuts through heavy corrosion | Not aggressive enough |
| Curvy or vertical parts | Can drip and run | Sticks in place on pipes |
| Small details & hardware | Harder to control on spokes | Easy “pea‑size” dot control |
| Quick touch‑ups | More elbow grease needed | Fast, light polishing |
Which To Choose – Metal Polish Or Metal Polish Cream For Buffing Motorcycle Engine?
Choose paste or liquid metal polish for tough jobs on large, heavily oxidized parts. Use metal polish cream for quick and precise buffing on exhausts, spokes, hardware, and other small areas to keep your bike looking good after every ride.
3. Aluminum Foil Buffing
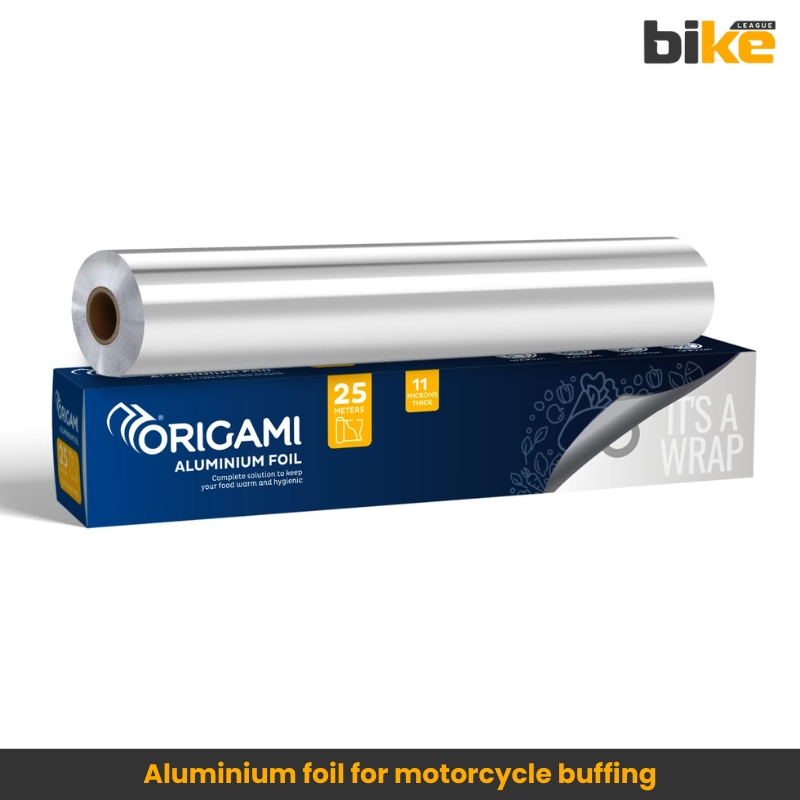
Aluminium foil buffing is an easy and inexpensive way to lightly polish chrome, stainless steel, and aluminium parts on your motorcycle using regular household foil. It’s handy for quick touch-ups and fixes while you’re out riding.
How To Use
- Tear off a sheet of aluminium foil and fold it into several layers.
- Use a minimal amount of metal polish or metal polish cream on the side of the aluminium foil you need to use.
- Rub gently over the metal surface using aluminium foil in small, even circular strokes.
- Repeat the same process using other sides or layers within the aluminium foil until it is blackened.
- Use a microfiber cloth to rub and bring shine after the entire process.
Pros
- Ultra‑Fine Finish: Foil’s soft aluminium won’t scratch chrome or stainless, making it great for removing light oxidation and water spots
- Cheap & Readily Available: No special tools or compounds are needed
- Conforms to Shape: Easily gets into grooves, seams, and around bolts
Cons
- Slow on Heavy Rust: Not aggressive enough for deep pitting or thick corrosion
- Can Tear: Thin foil may shred, leaving bits behind in tight gaps
- Oil Residue: A final wipe with cleaner or degreaser is required to remove the oil film
4. Green Compound Bar Buffing
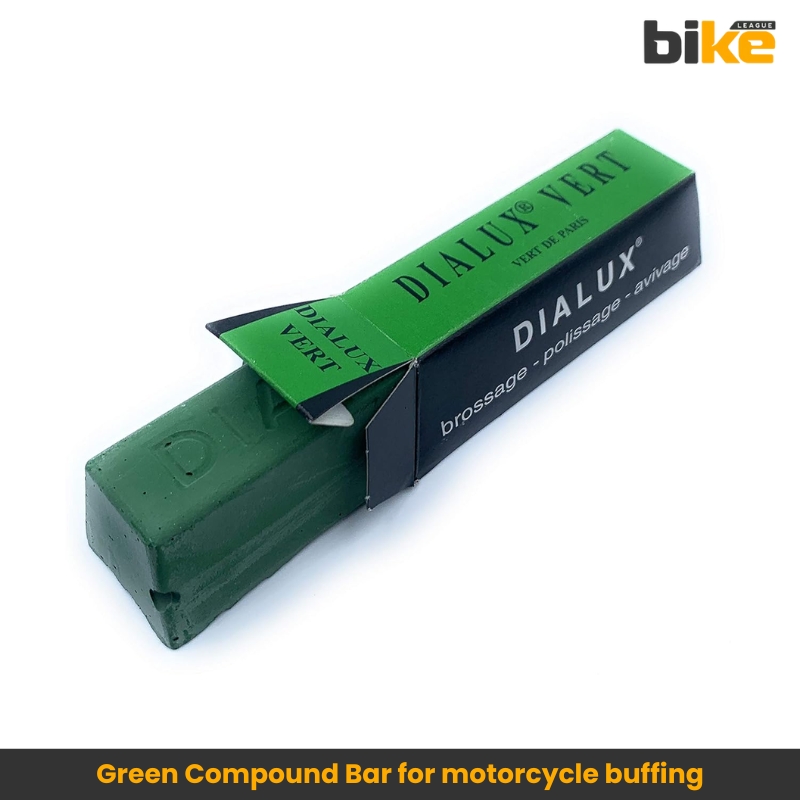
A green compound bar is a solid polishing stick, usually green in color, made with a medium-cut abrasive and a bit of grease so it sticks to a buffing wheel. It’s a popular choice in motorcycle shops and home garages for making chrome, stainless steel, and aluminium parts shine brightly and evenly.
How To Use
- Mount a clean cotton or flannel buffing wheel on a rotary tool or bench grinder.
- With the wheel spinning at the recommended speed, press the edge of the compound bar against it until the wheel picks up a light coating.
- Gently touch the spinning wheel to the motorcycle part, moving evenly and keeping the wheel flat against the metal.
Pros
- Moderate Cutting Power: Cuts through light oxidation and minor scratches faster than foil
- Consistent Application: The wheel distributes the compound evenly, giving a uniform shine
- Durable & Reusable: One bar lasts through many buffing sessions
Cons
- Requires Equipment: A powered buffing wheel or drill attachment is needed
- Risk of Over‑Buffing: Can generate heat or remove metal if held in one spot too long
- Messy Cleanup: Compound dust can get everywhere, so careful masking of surrounding areas is required
Which To Choose – Aluminum Foil Buffing Or Green Compound Bar Buffing?
Aluminium foil is a free and safe way to quickly touch up chrome pipes, spokes, and hardware after each ride. For deeper polishing, like removing light oxidation or scratches before a show or a long trip, use a green buffing compound bar with a buffing wheel. Work in short bursts to prevent overheating.
What Techniques To Follow For Buffing Different Shapes Of Motorcycle Parts?
Below is a table showing the best techniques for buffing different shapes of motorcycle parts.
| Part Shape | Tool/Pad | Technique Tips |
|---|---|---|
| Flat panels (tank guards, fenders) | Large cotton buff wheel or foam pad | 1. Run the wheel at moderate speed (1,000–1,500 RPM). 2. Apply the compound in thin ribbons. 3. Move in straight, overlapping strokes. |
| Cylindrical tubes (forks, handlebars) | Tapered cone or small spindle wheel | 1. Align the wheel to contact the tube on its “side,” not the edge. 2. Walk the wheel gently along the tube, keeping constant contact. |
| Recessed areas & crevices (badges, logos) | Mini felt wheel or hand‑held foam tip | 1. Work at a lower speed to avoid flying compound. 2. Use small circular motions, then wipe away residue. |
| Complex castings (engine covers) | Soft microfiber applicator & hand polish | 1. Apply finishing polish by hand to avoid over‑aggressive abrasion. 2. Buff gently with microfiber until gleaming. |
Pro tip: Always clean and degrease the chrome before you start. Any dirt left behind can scratch the surface when you use the buffing wheel.
Home-based Buffing For Motorcycles Or Professional Buffing, Which Is Best?
Both home-based and professional buffing have their advantages, depending on your needs, budget, and the condition of your bike’s metal parts. Here’s a comparison to help you choose the best option:
Home-based Buffing Vs Professional Buffing – Comparison
| Factor | Home‑Based Buffing | Professional Buffing |
|---|---|---|
| Cost | Low up‑front (basic compounds, pads, drill) | Higher (labor + shop overhead) |
| Equipment Needed | Drill or handheld rotary tool, Foam/cotton pads, Compounds or creams | Industrial buffer or spindle machine, Wide range of specialised wheels & compounds |
| Skill Level | Beginner‑friendly for light polishing, Steeper learning curve for deeper work | Pros know correct pressures, speeds, compound grades |
| Quality of Finish | Good for light oxidation, small scratches, may leave slight swirl marks if inexperienced | Consistently high—mirror‑bright, swirl‑free finishes |
| Time Investment | DIY prep + polish can take several hours | Drop‑off in morning, pick‑up same or next day |
| Convenience | Do it on your own schedule at home, No travel, shop appointments | Requires scheduling and transport to shop |
| Risk of Damage | Potential for overheating, over‑buffing, and new scratches if technique or tools are off | Professionals minimize risk; have dust‑collection and proper ventilation |
| Protective Environment | Garage or driveway—dust, dirt more likely | Clean, temperature‑controlled shop environment |
| Long‑Term Maintenance | Easy to touch up between professional sessions | May recommend specialized coatings or sealants |
When To Choose Home‑based Buffing For Motorcycles?
- Routine Upkeep: Light oxidation or water‑spot removal after rides
- Budget‑Minded DIY’er: You already have basic tools and want to learn
- On‑Demand Touch‑Ups: Quick shine between professional sessions
Key Tip: Start with mild compounds or creams, practice on a small area, and work in the shade to avoid heat buildup.
When To Opt For Professional Buffing For Bikes?
- Deep Restoration: Heavy pitting, deep scratches, or re‑plating prep
- Show‑Quality Finish: You want flawless, swirl‑free chrome or aluminium
- Time‑Sensitive Projects: You need it done quickly and ideally for a show or sale
Key Tip: Ask the shop about its wheel‑and‑compound progression (cutting →, polishing →, finishing) and whether it offers protective clear coats afterwards.
Which To Choose – Home-based Buffing Or Professional Buffing?
- Home‑based Buffing: For everyday maintenance and quick shine‑ups, home‑based buffing is cost‑effective and convenient.
- Professional Buffing: A professional setup will deliver superior, risk-minimised results for deep restorations and truly showroom finishes.
- Combine both: schedule an annual professional polish, then keep your bike gleaming between services with home‑based buffing.
What Are The Common Problems Encountered During Motorcycle Buffing, And How To Fix Them?
Even with proper tools and techniques, you may encounter common issues when buffing motorcycle chrome and engine parts. Knowing how to identify and fix these problems helps protect your bike’s finish and maintain its shine.
1. Stubborn Stains And Water Spots
Cause
Hard‑water deposits, road grime, or lingering oils that weren’t fully degreased before buffing.
How To Fix It
- Mix a diluted bike‑safe cleaner or mild soap with water; wipe with a soft microfiber and a soft‑bristle brush if needed.
- For mineral deposits or light stains, use a chrome‑specific polish (e.g., Autosol or similar) in a circular motion, then buff with a clean cloth.
- Rinse with clean water and dry completely before moving to buffing or polishing.
2. Light Pitting And Surface Corrosion
Cause
Age, moisture, or road salt eat into the chrome or aluminium, leaving small pits or dull, etched areas.
How To Fix It
- For light pitting, apply a medium-cut chrome polish or compound with a wool or stiff cotton buffing pad. Use 1,200–1,500 RPM and work in small overlapping passes. Avoid holding the pad in one spot to prevent heat damage.
- Deep pits may require professional re-plating or sanding and re-polishing, since aggressive home buffing can expose base metal and make rust worse.
- After fixing light pitting, apply a thin layer of non-abrasive paste wax or clear-coat sealant to protect against future corrosion.
3. Discolouration Or “burnt” Looking Spots
Cause
Overheating the metal from buffing in one spot too long, using too‑high RPM, or using a coarse compound on thin chrome.
How To Fix It
- Let the part cool, then inspect it. If the chrome is still intact, switch to a fine-cut or finishing compound with a soft bonnet pad, and gently buff in a moving pattern to even out the finish.
- If the chrome is bubbling, peeling, or looks burnt, stop buffing. These areas usually need professional replating.
- In the future, keep RPM between 1,200 and 1,800. Always move the wheel and avoid applying firm pressure on one spot for more than a few seconds.
4. Cloudy Or Hazy Finish After Buffing
Cause
Leaving polish residue, using the wrong final compound, or using too‑aggressive a grade without proper finishing.
How To Fix It
- Wipe the surface with a clean microfiber cloth, then buff again with a fine-cut or finishing compound (such as Simichrome or an ultra-fine liquid polish) on a soft cotton or foam pad at 1,500–1,800 RPM.
- If haze remains, use a mild degreaser or diluted all-purpose cleaner on a fresh cloth, dry thoroughly, and then apply a non-abrasive wax or sealant for a clear, glass-like finish.
- Finish with a non-abrasive wax or sealant to remove any micro-film haze and preserve the shine.
5. Swirl Marks Or Circular Buffing Trails
Cause
Holding the wheel at the same angle, using too‑high pressure, or not moving the pad in sweeping, overlapping strokes.
How To Fix It
- Switch to a softer foam pad and a fine-cut or finishing compound. Buff in longer, straight strokes instead of tight circles to help minimise swirls.
- Use light pressure and keep the wheel moving. If swirls are still visible after two rounds, a professional detailer can often remove them with a controlled compound and wheel sequence.
6. Chrome Or Metal “peeling” Or “flaking”
Cause
Old or poorly plated chrome that the buffing has exposed; the top layer is already lifting, so buffing just removes the rest.
How To Fix It
- Stop buffing right away. Once chrome starts to lift, it can’t be fixed at home.
- Mark the area and have it professionally stripped, re-plated, or replaced before you polish again.
- If you’re unsure whether the chrome is in good condition, test your method on a small, hidden area—especially on older bikes.
7. Excess Heat On Engine Parts (aluminium/engine Covers)
Cause
High RPM + too much pressure on thin or cast‑aluminium sections, which can warp or burn the finish.
How To Fix It
- Use a lower RPM (around 1,200) and gentle, steady strokes. Don’t press down on the same engine fin or cooling rib.
- For complex engine covers, hand-buffing with cream polish or a soft pad is safer than using aggressive drill-mounted wheels.
- After buffing, let the part cool in the shade for a few minutes, then check for any warping or color change.
Faq About Buffing Motorcycle Engine In India
1. Why Should I Buff My Motorcycle Engine And Chrome Parts?
Polishing your vehicle restores its shine and improves its appearance. Many polishing compounds create a micro-wax layer that protects against moisture and slows corrosion. Regular polishing also helps prevent grime buildup, making future cleaning easier.
2. How Often To Buff Chrome Parts In A Motorcycle?
- Normal riding conditions (daily commutes, weekend rides): Every 6 months or after ~3,000 miles—whichever comes first.
- Harsh environments (rain, salt, gravel roads): Quarterly, since grit and moisture accelerate pitting and corrosion.
- Show‑quality finish: Buff right before an event to remove any micro‑marring.
3. Can I Buff My Bike Engine At Home?
Yes—if you have:
- A bench buffer or a handheld rotary tool with polishing attachments
- A set of compounds (coarse, medium, fine) or an all‑in‑one cream polish
- Safety gear (glasses, mask, gloves)
- Follow proper masking and RPM control (1,200–1,800 RPM)
4. Should I Dismantle The Bike Engine Covers Before Buffing?
It’s best practice to remove any components you don’t want polished (e.g., painted parts, seals). If complete removal isn’t possible, carefully mask off areas with painter’s tape and plastic sheets.
5. What Are The Common Mistakes To Avoid While Buffing Using The Buffing Machine?
- Too much compound: Causes sling‑off and uneven cutting.
- Holding in one spot: Leads to heat spots and discolouration.
- Wrong RPM: Below 1,200 RPM, abrasives don’t cut; above 1,800 RPM, polish burns off the pad, and metal can overheat.
6. Is Buffing Safe For All Motorcycle Engine Finishes?
Soft aluminium and chrome‑plated steel respond well. Avoid buffing bare cast‑iron or painted surfaces. Start with a fine‑cut compound on chromed parts to prevent exposing the base metal.
7. How Do I Protect The Finish After Buffing?
After wiping off the residue, apply a thin, non‐abrasive paste wax or a clear‐coat sealant. Reapply every 2–3 months to maintain protection against India’s humidity and roadside pollutants.
8. When Should I Seek Professional Buffing Services?
- Deep pitting or heavy corrosion that home tools can’t remove safely.
- Complex shapes or inaccessible areas (e.g. deep cooling‐fin valleys).
- If you lack space, equipment, or experience, professionals can deliver a consistent, showroom‐quality finish with minimal risk of damage.
9. What Buffing Wheel Should I Use For The Buffing Machine?
- Wool or stiff cotton: for heavy cutting
- Soft cotton or foam bonnet: for final polishing and mirror finish
10. What Rpm Is Best For The Buffing Machine?
1,200–1,800 RPM. Too slow, and the polish won’t cut; too fast, and you risk overheating the part or slinging it off the compound.
11. How Do I Avoid Swirl Marks Or Heat Spots?
- Keep the wheel and workpiece moving
- Apply moderate, even pressure
- Clean or “flick” your buffing wheel frequently to prevent glazing
12. Should I Seal The Surface After Buffing?
Absolutely—wipe off all residue, then hand‑apply a thin coat of non‑abrasive paste wax or clear sealant to protect against humidity, rain and road grime.
13. What Are The Best Brands Of Chrome Polish For Buffing A Motorcycle Engine In India?
Here are some of the renowned brands of chrome polish in India
- Menzerna M-PPC-T Metal Polishing Cream
- Autosol Metal Polish
- 3M 39527 Chrome & Metal Polish
- Turtle Wax T‑284 Premium Grade Chrome & Metal Polish
- Mothers California Gold Chrome Polish
- Würth Paint & Metal Restoration Polish
Other Related Links From Bikeleague India
- Bike tyre polish in India: Elevate your motorcycle tyre look now
- Bajaj Chetak 3502
- Bajaj Chetak 3501
- Honda Shine 100
- Honda Shine 125
Conclusion
Whether you’re a DIY enthusiast or rely on professional services, regular buffing keeps your motorcycle’s engine and chrome parts looking their absolute best while safeguarding them from the elements. By following the right methods and using suitable tools, you ensure both the longevity and the showroom shine of your bike.
If you have any other doubts or queries, email us at bikeleague2017@gmail.com. You can also share your doubts or opinions in the comments section below. We are always eager to help and assist you. Also, here are several social media accounts for Bikeleague India that should raise your suspicions.