
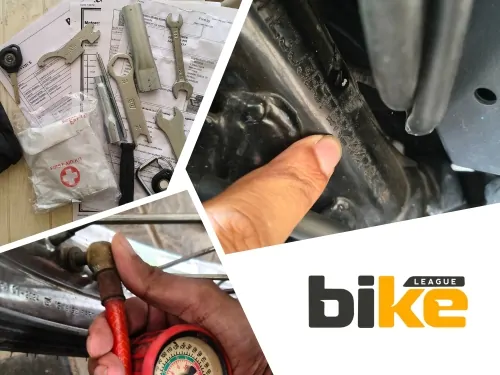
Before you accept a new motorcycle or scooter, make sure the vehicle you receive matches your booking. Check that the main features have been shown to you and that the documents have the right information.
If you are getting an electric two-wheeler, make sure you get the charging equipment, check the auxiliary battery if needed, set up any accounts, and confirm any connected features you bought. For petrol models, check the engine, fluids, and transmission controls.
A pre-delivery inspection (PDI) helps you spot visible problems, missing items, or paperwork errors before you take the vehicle. It can’t promise there are no hidden issues, and it doesn’t replace the dealer’s technical checks.
This guide gives you a checklist for buying petrol and electric motorcycles and scooters in India. It does not use general limits for things like odometer readings, tyre age, or battery health, since these numbers don’t fit every model.
Key Takeaways
- Inspect the actual vehicle allocated to you, not only a display or demonstration vehicle.
- Match its identification details with the invoice, insurance, and applicable registration records.
- Inspect visible condition before accessories or delivery decorations obscure it.
- Ask the dealer to demonstrate controls, lights, brakes and fitted safety features.
- Check every supplied key or fob and the applicable backup-access procedure.
- For an EV, witness charging and verify the equipment included in your purchase.
- Distinguish traction-battery charge, predicted range, auxiliary-battery condition and battery-capacity assessments.
- Use the exact model’s manual for pressures, fluid checks, adjustments and warning-light behaviour.
- Mark undemonstrated functions as “not checked,” not satisfactory.
- Record unresolved issues and recheck them before acknowledging satisfactory delivery.
What Is Pdi In A Bike Or Scooter?
PDI stands for pre-delivery inspection. When buying a new two-wheeler, distinguish between the dealer’s technical inspection and your delivery checks.
| Inspection | Purpose |
|---|---|
| Dealer or manufacturer PDI | Technical preparation and checks performed under the manufacturer’s procedures. |
| Buyer’s delivery inspection | Verify the allocated vehicle’s identity, visible condition, demonstrated functions, supplied equipment, and documents. |
| Independent inspection, if booked | An additional assessment within the provider’s agreed scope, access and testing limitations. |
Ask whether the dealer has finished their technical PDI and whether they can provide a record of it.
Your own inspection does not replace the dealer’s work. At the same time, even if the dealer gives you a completed checklist, you still need to check the vehicle, equipment, and documents you get.
Is Pdi Mandatory For A New Bike In India?
A pre-delivery inspection (PDI) is a recommended step when purchasing a new motorcycle or scooter in India. There is no general statutory requirement specifically making a buyer’s PDI compulsory before taking delivery.
However, buyers should be aware of Section 41 of the Sale of Goods Act, 1930. It provides that a buyer who has not previously examined the goods must receive a reasonable opportunity to examine them to verify whether they conform to the contract. On request, the seller must provide a reasonable opportunity for examination when tendering delivery, subject to the Act’s terms.
There are three different types of inspection:
- Dealer PDI: Technical checks performed by the dealership before handover.
- Buyer PDI: Inspection by the customer to verify the vehicle’s condition, specifications, accessories, and documents.
- Independent PDI: An optional inspection by a third-party professional.
A buyer’s PDI is not required by law, but it is strongly recommended to inspect the vehicle before you accept it. Write down any problems or differences you find and ask for them to be explained or fixed before you finish the handover.
Can A Dealer Refuse Pdi For A New Bike In India?
A dealer can set fair safety and access rules for inspections, but you should still ask for a fair chance to check the vehicle before you accept it.
Section 41(2) of the Sale of Goods Act, 1930 states that, unless otherwise agreed, a seller must provide the buyer a reasonable opportunity to examine goods when delivery is offered, if the buyer requests it. This concerns checking whether the vehicle conforms to the purchase agreement; it does not automatically guarantee access for every independent inspection or diagnostic test.
If the dealer does not allow you to inspect the vehicle:
- Request permission to inspect the allocated vehicle in writing.
- Ask the dealer to explain any access or safety restrictions.
- Request an alternative inspection or the dealer’s completed PDI record.
- Keep copies of messages, payment records, and the dealer’s response.
- Record any unresolved concern before accepting delivery.
If the problem is not solved, you can contact the manufacturer’s customer care or get help from the National Consumer Helpline. You may also consider filing a complaint with the appropriate Consumer Commission if needed.
For example, the supplied Activa 125 check sheet includes technical checks, equipment verification, defect recording, and technician and sales-representative certification. The supplied Suzuki-branded e-scooter job card separately records battery, charging, control, chassis and riding checks, with workshop and technician sign-off. Sources: Activa 125 check sheet; E-Access check sheet.
Scope Of This Guide
This guide is meant to help buyers inspect their vehicles. It is not an official technical standard from the manufacturer.
Specifications, charging needs, warning lights, equipment, and warranty terms can differ by model. Always use the documents that match the exact vehicle you are getting.
The three check sheets linked in the sources show inspection categories for specific models. Their steps and numbers should not be used for other vehicles. Also, the 2026 title does not mean all the documents were published in 2026.
When Should You Inspect The Vehicle?
Set up your inspection before your delivery appointment. Ask the dealer when you can see the vehicle and have them explain the steps for payment, registration, and handover.
If you can, try to inspect the vehicle before you approve the next step that can’t be undone. This is something to talk about with the dealer, since not all dealers follow the same process.
| Inspection stage | What to check | What to record |
|---|---|---|
| Before the agreed finalisation stage | Allocated vehicle, model, variant, colour, visible condition and included equipment. | Identification, photographs, concerns and agreed action. |
| At delivery | Same vehicle, completed rectification, functions, documents, keys and supplied equipment. | Odometer, fuel or charge indication, pending items and handover condition. |
Pick a place with good lighting for your inspection. Don’t let a delivery ceremony or a rushed appointment stop you from doing your checks.
What Should You Bring For Pdi?
| Item | Purpose |
|---|---|
| Booking confirmation and accepted quotation | Check the model, variant, price, and agreed inclusions. |
| Written accessory and benefit list | Identify missing, substituted, or pending items. |
| Phone | Record observations, photographs, and document copies. |
| Small torch | Inspect accessible areas with poor lighting. |
| Checklist or notes | Track findings and rectification. |
| Driving licence and riding equipment | Preparation for a permitted ride, if arranged. |
| Another person, if helpful | Record findings while you inspect. |
Never crawl under a vehicle that isn’t supported, take off panels without approval, or take parts apart.
Use A Clear Status For Every Check
During your inspection, use these four statuses:
| Status | Meaning |
|---|---|
| Satisfactory | The relevant inspection or demonstration was completed without an unresolved concern. |
| Issue found | A defect, discrepancy, or unexplained result needs action. |
| Not applicable | The item is not fitted or does not apply to the vehicle. |
| Not checked | Access, permission, equipment, or a demonstration was unavailable. |
“Not checked” means something different from “not applicable.” If a feature is installed but not shown working, it’s still unverified.
The Activa sheet separates satisfactory items, defects, and items that don’t apply, and lets you note problems and repairs. Including a “not checked” status gives buyers a clearer record. Sources: Activa 125 check sheet.
1. Confirm The Vehicle’s Identity And Specification
Check the vehicle’s identity first, before looking at its appearance.
| Check | What to verify |
|---|---|
| Model and variant | Match the booking, quotation and invoice. |
| Colour | Match the vehicle and document description. |
| Chassis number or VIN | Compare the actual identifier with the paperwork. |
| Engine or traction-motor identification | Check the applicable identifier where accessible. |
| Manufacturing details | Ask the dealer to show the manufacturer’s label or record. |
| Variant equipment | Confirm the brakes, wheels, display, and other purchased features. |
| Allocated vehicle | Record identifying details so you can recognise it at delivery. |
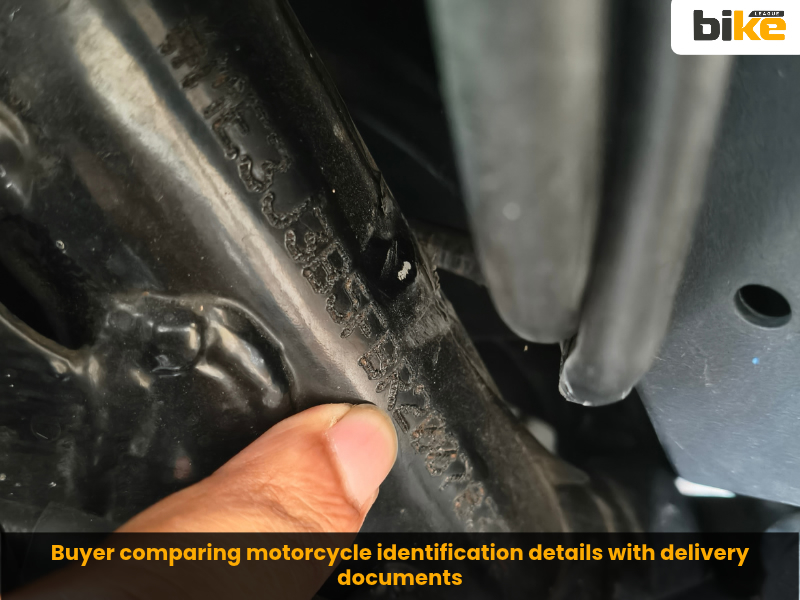
The supplied petrol-scooter sheet records frame and engine numbers, while the e-scooter job card records frame and traction-motor numbers. Use the identifiers applicable to your vehicle. Sources: E-Access check sheet.
If you find any differences, ask the dealer to explain and fix them before you continue.
Factory-customised And Build-to-order Vehicles
If your vehicle is factory-customised or built to order, check that the hardware and accessories match your order sheet. Check how things are fitted and whether they work, not just the variant name on the invoice. Write down any swapped or missing items and what the dealer promises to do about them.
Source: TVS Apache RTX 300 BTO checklist.
Do Not Use An Unverified Vin-decoding Rule
If you can’t confirm a manufacturing-date code, ask the manufacturer or dealer to explain it. Don’t guess that a certain character always means the month or year for every brand.
Write down the manufacture date, invoice date, registration date, delivery date, and warranty start date separately. Don’t mix them up.
2. Inspect Bodywork, Contact Points, And Visible Components
Look over all surfaces before any accessories, covers, or decorations are added. If dirt makes it hard to check, ask for it to be cleaned before you mark the area as okay.
| Area | What to inspect | Follow-up |
|---|---|---|
| Painted surfaces | Scratches, dents, cracks, and obscured areas. | Request an unobstructed inspection. |
| Panels and trim | Loose panels, broken trim, missing pieces, and damaged fasteners. | Record the location and request assessment. |
| Levers and handlebar ends | Scraping, bending, cracks or other damage. | Ask for an explanation without assuming the cause. |
| Mirrors | Housing condition, mounting and adjustment. | Request correction where necessary. |
| Footrests and pedals | Damage to rider/pillion footrests and applicable controls. | Ask the technician to check security and operation. |
| Seat | Cover, seams, accessible base and latch. | Do not force a sticking mechanism. |
| Lamps | Lens damage, insecure housings, and missing components. | Include the affected lamp in the function test. |
| Exhaust, petrol models | Accessible pipes, silencer, heat shields and mountings. | Do not touch hot components. |
| Stands | Visible condition and demonstrated operation. | Have staff support the vehicle safely. |
| Accessible underside | Impact marks, broken covers, hanging wiring, or leakage. | Request technician inspection. |
| Accessible edges and attachments | Burrs, sharp edges, missing visible fasteners, or insecure accessories. | Ask the technician to assess and correct concerns. |
The Activa sheet lists final checks for fasteners, mirror fitment, burrs, and sharp edges. These checks help buyers spot issues, but they do not replace proper tightening or torque checks done in the workshop. Sources: Activa 125 check sheet.
Focus on describing what you see instead of trying to figure out the cause. For example, if you notice a scratched lever, explain what you see, but remember this does not show how the damage happened.
Storage History And Findings Requiring Explanation
Check for water marks, corrosion, mismatched paint, rubbing, or unusual marks from tools or panel removal. If you find anything, ask the dealer to explain it and, if needed, share the vehicle’s storage history or whether it was used for display or demonstrations. Seeing a mark alone does not tell you the full history.
Look over the frame, steering-head area, visible welds, subframe, footrest brackets, and engine mounts if you can reach them. Note any cracks, impact marks, odd paint, or damaged brackets, and ask for an expert to check them. Do not try to diagnose or adjust these parts yourself.
Source: TVS Apache RTX 300 BTO checklist.
Seat, Storage And Owner-accessible Areas
| Check | What to verify | Inspection boundary |
|---|---|---|
| Seat release | Normal opening, closing and latching. | Do not force the mechanism. |
| Storage locks | Supplied keys or electronic releases work. | Ask for the correct sequence. |
| Storage equipment | Included light, outlet and accessories. | Check equipment fitted to your variant. |
| Accessible battery area | Damage, insecure parts or trapped wiring. | Do not disconnect terminals or open enclosures. |
| Fuse-box area | Accessible cover and surrounding wiring. | Do not substitute fuses to investigate a fault. |
| Visible wiring | Damaged insulation or unexplained modifications. | Do not unplug connectors or open modules. |
Component locations can be different. Don’t expect every motorcycle or scooter to have the same under-seat setup.
3. Check Tyres And Wheels
| Component | What to inspect | Dealer check |
|---|---|---|
| Tyres | Cuts, bulges, cracking, embedded objects, or visible damage. | Investigate suspicious findings. |
| Tyre specification | Size and relevant direction markings. | Confirm against the exact model’s specification. |
| Pressure | Request a pressure check. | Use the value for the relevant load condition. |
| Tyre seating | Any visibly uneven seating around the rim. | Ask the technician to assess the finding. |
| Valves | Damage and missing caps. | Assess suspected damage or leakage. |
| Rims | Chips, cracks or deformation. | Investigate concerns. |
| Spokes, where fitted | Visible damage or missing components. | Check condition and security. |
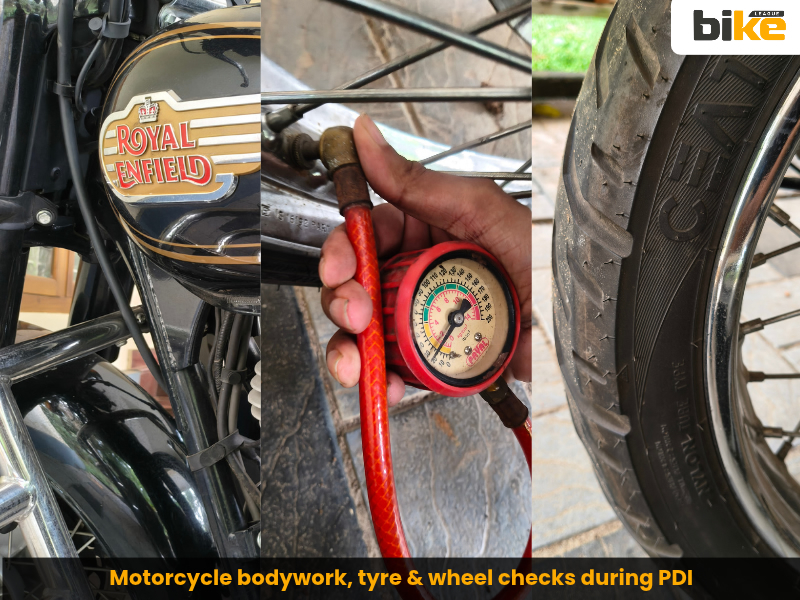
The Activa sheet says to adjust tyre pressure based on the vehicle’s information sticker and to check for tyre damage and bent or cracked wheels. The e-scooter job card also asks you to check the seating of both front and rear tyres. Sources: Activa 125 check sheet; E-Access check sheet.
Tyre-pressure Monitoring System, Where Fitted
If your vehicle has TPMS, ask the dealer to make sure the sensors are installed, paired, and working. Check the displayed cold tyre pressures with a reliable gauge, following the manufacturer’s instructions. If you see any differences or missing readings, ask the dealer to explain.
Do not assume that a TPMS menu proves sensors are included. Verify the actual purchased package and record any demonstration that could not be completed.
Source: TVS Apache RTX 300 BTO checklist.
Spoked Wheels And Wheel Rotation
Don’t try to adjust the spokes yourself or tap them with a tool to check their condition.
If rotation is required, have dealership staff support the vehicle and perform the check. Keep fingers and objects away from moving wheels, brake components and the drive system.
Don’t try to reseat a tyre on your own.
Tyre Manufacturing Dates
If you want to know more, write down the tyre markings and ask the dealer or tyre maker to explain them.
Don’t set a universal age limit for tyres without support. Also, don’t use the presence or absence of small rubber moulding projections as your only test for acceptance.
4. Inspect Steering, Suspension And Brakes
| Component | Buyer’s visible check | Dealer demonstration or assessment |
|---|---|---|
| Steering | Interference, stretched cables or obvious looseness. | Normal movement with safe vehicle support. |
| Suspension | Accessible damage or leakage. | Assessment and explanation of relevant settings. |
| Brake controls | Visible lever or pedal damage. | Operation and travel against specification. |
| Hoses and cables | Damage, insecure routing or interference. | Assessment without unnecessary opening. |
| Discs and accessible pads | Visible damage or concerns. | Measurement where required. |
| ABS components, where fitted | Visible sensor-wire or ring damage. | Warning sequence and fault assessment. |
| Combined braking, where fitted | Visible control condition. | Explanation and demonstration of the model’s system. |
| Parking brake or brake lock | Visible condition. | Operation where fitted. |
The e-scooter job card covers checks like steering-bearing movement, suspension condition, brake hoses, fluid level, combined-brake operation, and the brake lock. Use these to check each system on your vehicle, rather than using one vehicle’s braking sequence for another. Sources: E-Access check sheet.
Don’t change preload, damping, or fasteners to finish the checklist. If a fork tube is hidden by a gaiter, check with the technician to see if it needs to be accessed.
Don’t assume every rear shock should be set to its lowest position. Ask what setting is right for your model and the load you plan to carry.
A visual check by the buyer does not measure disc runout, pad thickness, or ABS sensor clearance.
Record Adjustable-suspension Delivery Settings
If your vehicle has adjustable suspension, ask the dealer to show you the adjusters, confirm the correct delivery settings, and note the settings you receive. Make sure you know the manufacturer’s baseline and any dealer-agreed changes for your load. Don’t adjust the suspension to finish your checklist.
| Function | Demonstration to request |
|---|---|
| Headlamp | Low beam, high beam and passing function where fitted. |
| Headlamp aim | Confirmation that alignment has been checked through the applicable procedure. |
| Indicators | Front, rear and dashboard indication. |
| Tail and brake lamps | Tail-lamp operation and activation from relevant brake controls. |
| Number-plate illumination | Operation under the normal lighting arrangement. |
| Horn | Normal operation. |
| Hazard lights | Operation if included. |
| Throttle | Smooth operation and correct return to the released position, with play checked against specification where applicable. |
| Display | Odometer, fuel/charge and relevant settings. |
| Display controls | Buttons, switches, trip functions and information screens. |
| Instrument illumination | Normal panel lighting. |
| Clock | Correct time and setting procedure. |
| Gear or riding-mode display | Correct response during demonstration. |
| Accessory outlet | Operation of the supplied outlet. |
| Warning indicators | Prescribed self-check, starting and movement-related sequence. |
With dealership staff holding the vehicle safely, ask them to check that normal steering movement doesn’t pull cables, pinch hoses, cause body contact, or affect throttle return.
Source: TVS Apache RTX 300 BTO checklist.
5. Test Lights, Controls And The Display
| Area | What to check or demonstrate | Avoid |
|---|---|---|
| Starting | Correct sequence and normal operation. | Repeated revving or stress tests. |
| Engine operation | Investigation of persistent noise, stalling, smoke, leakage, or warnings. | Diagnosing a major fault from one brief sound. |
| Fuel | Permitted specification and stated ethanol compatibility. | Inferring compatibility from delivery year. |
| Fuel filler | Cap operation and visible collar/seal condition. | Inserting objects into the tank. |
| Clutch and gears | Operation and neutral indication where applicable. | Another model’s adjustment values. |
| Chain and sprockets | Condition, adjustment and lubrication where applicable. | Assuming a particular brand must be fitted. |
| Starting interlocks | Correct sequence and response. | Bypassing switches. |
| Engine-stop switch | Normal operation where fitted. | Improvised electrical testing. |
| Idle-stop/start | Required operating conditions and function. | Declaring a fault without checking conditions. |
| Kick starter | Demonstration if fitted. | Assuming every petrol vehicle has one. |
| Scooter releases | Seat, fuel lid and parking mechanism. | Forcing the mechanism. |
| CVT | Normal operation during a permitted demonstration. | Removing the transmission cover. |
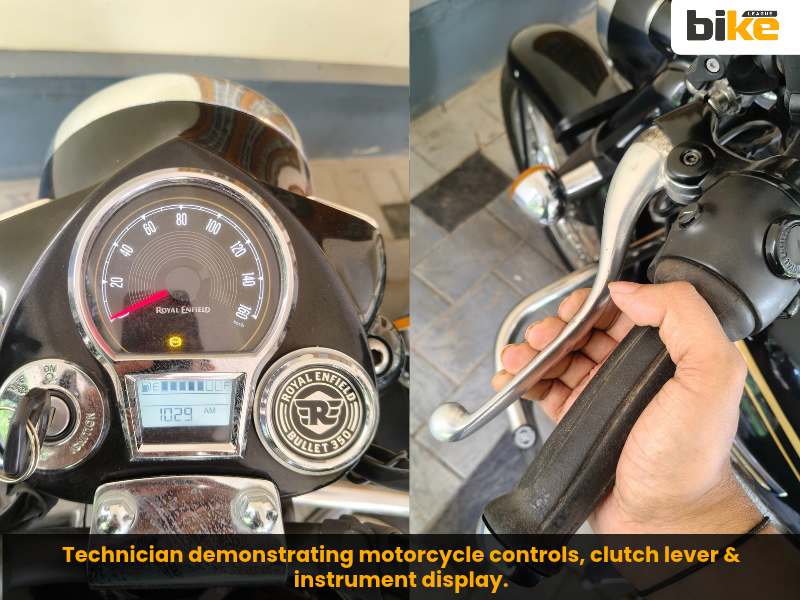
The Activa sheet specifically includes throttle play and smoothness, headlamp alignment, panel illumination, trip-button condition, and clock setting. These are separate checks from simply confirming that the engine starts or the dashboard switches on. Sources: Activa 125 check sheet.
If the throttle feels sticky or there is any interference, ask the technician to check it before the riding demonstration.
If any functions are not demonstrated, make a note of them instead of marking them as satisfactory.
Interpret Warning Lights Correctly
Ask which indicators:
- Illuminate during self-check.
- Go out after starting or reaching the ready state.
- Remain on until movement.
- Indicate a selected feature.
- Require attention if they remain illuminated.
Do not expect every warning lamp to behave alike. The supplied petrol and electric check sheets identify different warning and status indications, reinforcing the need to use the exact model’s instructions. Sources: Activa 125 check sheet; E-Access check sheet.
6. Petrol Motorcycle And Scooter Pdi Checklist
| Item | Applicable vehicles | Checking requirement |
|---|---|---|
| Engine oil | Petrol models. | Check at the specified position, temperature, and waiting period. |
| Coolant | Liquid-cooled models. | Prescribed accessible check; do not open a hot system. |
| Brake fluid | Applicable hydraulic systems. | Specified level-checking procedure. |
| Other fluids | Where specified. | Relevant manufacturer procedure. |
If possible, ask that the engine is not warmed up right before inspection. The technician should then follow the model’s procedure for the next checks.
The Activa sheet includes checks for starting, fuel-pump operation, engine oil, idle speed, kick-start operation, and engine-stop-switch operation. Its particular timings and warm-up instructions are model-specific workshop guidance, not universal buyer procedures. Sources: Activa 125 check sheet.
Ask the dealer to show you the owner-level checking method from the manual for your model. Don’t use the same oil-checking position, idle speed, or fluid type for all models.
Have the dealer open the fuel cap as usual. Check the collar, seal, and surrounding area for dirt, corrosion, or damage.
For motorcycles with chain drive, make sure the chain is adjusted and lubricated. Some motorcycles use other final-drive systems.
Cooling System And Fresh-leak Checks
For liquid-cooled models, check the radiator, hoses, and visible joints for any damage, wet spots, or residue. Ask the dealer to show you the cooling fan works using the workshop procedure. Don’t open a hot cooling system or let the engine idle too long to make the fan run.
If you notice fluid that looks odd, oily film, residue, or fluid loss, ask the technician to check it. Write down what they find instead of guessing the cause yourself.
Chain Drive And Quickshifter, Where Fitted
For chain-driven models, have the technician check the chain slack using the manual, as well as wheel alignment, lubrication, and look for tight spots, rust, damage, or the chain touching the guard. Only dealership staff should rotate the wheel, with the engine off and the bike safely supported.
If your motorcycle has a quickshifter, ask the dealer to demonstrate it as the manufacturer recommends. Don’t try to change gears while the bike is stationary to test it.
Source: TVS Apache RTX 300 BTO checklist.
Starting Battery And Electrical Preparation
Check with the dealer whether the starting battery has been tested and whether it needs charging or any fixes.
The Activa sheet includes battery-voltage, terminal, cable-routing, fuse, and starting-performance checks. Terminal connections, protective treatments, and electrical rectification are part of the dealer’s technical preparation, not the buyer’s DIY inspection. Sources: Activa 125 check sheet.
7. Electric Motorcycle And Scooter Pdi Checklist
| Item | What to inspect or verify | Boundary |
|---|---|---|
| Accessible battery protection | Impact damage, broken covers or insecure parts. | Do not open the battery enclosure. |
| Charging port | Condition, cover and connection. | Do not probe terminals. |
| Visible cables | Damaged insulation or heat damage. | Do not disconnect internals. |
| Charger | Correct equipment, condition and identifying details. | Follow its instructions. |
| Cable and connectors | Damage and correct connection. | Do not improvise repairs or adaptors. |
| Charging indications | Meaning and response during demonstration. | Ask for unexplained indications to be assessed. |
| Removable battery | Permitted removal, refitting and locking. | Do not remove fixed batteries. |
| Battery arrangement | Ownership, lease, swapping or subscription. | Do not assume ownership is included. |
| Auxiliary battery, where fitted | Confirmation of the dealer’s condition check. | Do not apply a universal voltage threshold. |
If you see smoke, feel unusual heat, or notice damaged insulation, stop the demonstration right away, move away from the vehicle, and tell the dealership staff. Don’t touch or try to disconnect anything that looks unsafe.
Auxiliary Battery, Where Fitted
Ask if the vehicle has a separate low-voltage auxiliary battery and if the dealer checked its condition during the PDI.
Write down any issues reported and what was done about them. Keep this separate from the traction battery’s charge level or diagnostic results.
The supplied e-scooter job card separately records a 12V auxiliary-battery check and traction-battery SOC and SOH readings. Its numerical requirements should not be generalised to other EVs. Sources: E-Access check sheet.
Check The Electric Drive System
Ask for a demonstration of:
- Normal power-on and power-off sequences.
- Ready-to-ride indication.
- Riding-mode selection.
- Controlled take-off, where a permitted demonstration is available.
- Relevant drive-enable interlocks.
- Side-stand motor cut-off, where fitted.
- Reverse or parking-assist mode, where fitted.
If the vehicle has reverse or parking assistance, ask how to start, use, and stop this feature. Watch for the correct display indication.
The e-scooter job card explicitly includes reverse operation and a side-stand switch with motor-power cut-off. Verify the equivalent features only where fitted to your vehicle. Sources: E-Access check sheet.
Write down any unexpected warnings, strange noises, or unusual behavior. Never bypass switches or open the motor, controller, or drive-system enclosures.
Witness Charging
Ask the dealer to demonstrate:
- Inspection of the equipment and connection point.
- Correct connection.
- Charger and dashboard indications.
- Confirmation that charging has started.
- Correct stopping and disconnection.
- Closing the charging-port cover.
The supplied e-scooter job card includes portable-charger operation and confirmation that the vehicle charges. A buyer’s demonstration should establish observed operation without being mistaken for a full battery assessment. Sources: E-Access check sheet.
Follow the instructions for the charger that comes with your vehicle. Don’t use requirements from a different charger for sockets, ventilation, installation, or extension leads.
Confirm Home-charging Suitability
| Question | Confirmation required |
|---|---|
| Approved charger | Correct equipment for the vehicle. |
| Supply and socket | Manufacturer-specified requirements. |
| Earthing and protection | Assessment by the installer or qualified electrician. |
| Installation responsibility | Organisation and contact details. |
| Included work | Package scope and limits. |
| Additional cost | Written quotation. |
| Location and exposure | Applicable indoor/outdoor restrictions. |
| Adaptors or extension leads | Explicit equipment instructions. |
| Cable routing | Arrangement appropriate to the assessed location. |
Don’t try to take live electrical measurements yourself. Have an authorised installer or qualified electrician check the location for you.
Record Supplied Charging Equipment
| Item | Included in purchase? | Supplied or pending? | Identifying details/notes |
|---|---|---|---|
| Portable charger | |||
| Fixed charging unit | |||
| Cable/accessories | |||
| Installation | |||
| Warranty information | |||
| Subscription/service |
Fill this out based on your order. You may not have every item listed.
Battery Health: Understand The Limits
| Observation | What it records | What it does not establish |
|---|---|---|
| Charge percentage or SOC | Displayed charge at that time. | Full original or usable capacity. |
| Predicted range | Displayed estimate. | Guaranteed riding distance. |
| Charging demonstration | Operation during that demonstration. | Long-term battery health. |
| Short ride | Basic operation observed. | Complete usable-capacity test. |
| Displayed SOH | The reported value under the system’s method. | A universally comparable capacity measurement. |
| Diagnostic report | Results within its stated scope. | Anything beyond that scope. |
| Capacity assessment | Results under the stated test procedure. | Performance under every future operating condition. |
The e-scooter job card records SOC and SOH separately. This distinction is useful, but the presence of an SOH field alone does not explain how a reading was obtained or whether usable capacity was measured. Sources: E-Access check sheet.
Don’t use the same SOH rejection limit for all brands, and don’t assume that a full-charge display means the battery has its full original capacity.
If Electronic Diagnostics Are Offered
Ask:
- Which systems were accessed?
- What equipment or procedure was used?
- What warnings or results were recorded?
- Was capacity measured, or was a displayed value read?
- What could not be checked?
- Does the report identify the vehicle and inspection date?
- What follow-up is recommended for an unexplained result?
Remember, a general scan might not include a capacity test or rule out hidden faults.
8. Check Keys, Connected Features And Account Access
| Item | What to verify |
|---|---|
| Keys and fobs | Quantity matches the purchased package; each supplied item works. |
| Emergency key | Applicable seat, lock or backup-access operation. |
| Keyless access | Normal and backup access demonstrated. |
| Answer-back function | Operation where fitted. |
| App | Official source. |
| Account | Your intended phone number and email. |
| Pairing | Your phone connects. |
| Purchased functions | Match the variant and package. |
| Navigation | Setup and display operation where included. |
| Subscription | Activation, duration and renewal terms. |
| Software | Displayed version and pending setup. |
| Handover | Not dependent on a salesperson’s account. |
The e-scooter job card separately checks fob operation, answer-back, emergency-key access, Bluetooth pairing, and navigation. These deserve individual confirmation rather than a single “connected features checked” tick. Sources: E-Access check sheet.
Find out what to do if the fob battery runs out or your phone isn’t available. Not all backup methods work the same way.
Keep your key numbers, access codes, and any photos of security credentials private.
Make a note of any pending functions, who is responsible, the expected completion date, and any extra costs.
9. Check Documents, Insurance And Registration
| Record | What to verify |
|---|---|
| Invoice | Buyer details, vehicle identifiers, and purchased items. |
| Receipt | Payments and outstanding adjustments. |
| Insurance | Insured details, vehicle identification, coverage, and dates. |
| Registration | Completed steps, issued details and pending status. |
| Sale/roadworthiness records | Applicable vehicle details and documentation. |
| Warranty | Vehicle, relevant components and extensions. |
| Service information | Applicable maintenance requirements. |
| Accessories | Supplied and pending items. |
| Finance | Agreed lender, loan details, and applicable entries. |
| Dealer PDI record | Vehicle identity, inspection date, findings, and responsible-person acknowledgement, where available. |
Ask which records have been given or submitted. Not every item needs to be a separate paper document.
An application is not the same as completed registration. Do not treat an invoice or receipt alone as confirmation that the vehicle is ready for lawful road use.
Look at the actual insurance policy, not just the insurance charge on your invoice. Make sure all details are correct.
Request The Dealer’s Completed Pdi Record
Request a copy or a photo of the completed dealer PDI record if it’s available.
Useful details include:
- Vehicle identification.
- Inspection date.
- Recorded readings.
- Defects or exceptions.
- Rectification undertaken.
- Technician or responsible-dealer acknowledgement.
The Activa sheet provides technician and sales-representative certification and instructs the dealer to retain the PDI sheet. The e-scooter job card includes workshop and technician sign-off. Sources: Activa 125 check sheet; E-Access check sheet.
Store the dealer’s record separately from your own checklist as a buyer.
Diagnostic Results And Service-reminder Setup
Check if the manufacturer’s PDI includes a diagnostic scan and service-reminder setup. If it does, ask for the results, which systems were checked, and explanations for any fault codes or repairs. Also, confirm that the service reminder is set up for your vehicle.
Don’t assume that an unexplained “scan clear” means a full inspection or that there are no hidden faults. If a scan wasn’t done or was outside the agreed scope, make a note of that instead of marking it as complete.
Source: TVS Apache RTX 300 BTO checklist.
10. Read The Warranty And Service Requirements
| Item | What to establish |
|---|---|
| Vehicle coverage | Applicable terms and exclusions. |
| Battery and charger coverage | Separate EV terms where applicable. |
| Auxiliary battery | Applicable coverage, if separately specified. |
| Extension | Whether purchased and what it includes. |
| Start date | Relevant commencement date. |
| Limits | Time and distance where specified. |
| Maintenance | Required schedule and conditions. |
| Battery capacity | Whether a provision exists and how it is assessed. |
| Connected services | Subscription and support terms where applicable. |
| Claims | Contacts and procedure. |
Refer to the warranty document that matches your vehicle, its parts, and the package you bought.
Do not assume that vehicle, traction battery, auxiliary battery, charger, accessories, and connected services all have identical coverage.
Ask the dealer to show you the service schedule and explain what dates or readings set the timing for your first service.
11. Take A Permitted Short Ride, If Available
If you are allowed a low-speed demonstration, pay attention to the following:
- Controlled take-off.
- Throttle response.
- Braking.
- Steering.
- Applicable clutch and gear operation.
- Suspension behaviour.
- Unexpected warnings.
- Persistent unusual noise or vibration.
The check sheets for petrol scooters and e-scooters cover riding or road-test items like braking, steering, suspension, noise, and display operation. The EV sheet also checks reverse operation. Sources: E-Access check sheet.
If the vehicle has regenerative braking, ask the dealer to explain how it works and show you what is normal. Check the model’s manual, as not all EVs or driving conditions behave the same way.
Avoid:
- Top-speed tests.
- Forced ABS activation.
- Hands-off riding.
- Abrupt acceleration.
- Water crossings.
- Range testing.
- Improvised attempts to provoke a fault.
Ride only in allowed areas, with the right permission, proper riding gear, and after meeting all legal requirements.
If you cannot take a ride, make a note of anything you could not check.
Recheck After Running Or Riding
Once the demonstration is over and the vehicle is shut down, ask the technician to check for any new drips, wet spots, or warning lights in areas you can see. Don’t touch anything that might be hot. Write down what you find and what the dealer says before you finish the handover.
Source: TVS Apache RTX 300 BTO checklist.
12. Record Problems And Recheck Repairs
| Field | What to record |
|---|---|
| Vehicle identity | Chassis/VIN and model. |
| Observation | Factual description and location. |
| Evidence | Photo, video or document. |
| Response | Dealer explanation and proposed action. |
| Responsibility | Named contact or department. |
| Completion | Agreed next step and date. |
| Cost | Any agreed charge or confirmation of no charge. |
| Recheck | Result after rectification. |
| Final status | Resolved, pending or not verified. |
The Activa sheet says to describe and mark any problems or defects after they are replaced or repaired. Your own record should also show the difference between “repair promised” and “repair completed and rechecked.” Sources: Activa 125 check sheet.
Wait to accept the vehicle if there are any unresolved issues with identity, brakes, steering, leaks, structure, electrical parts, or charging. Make sure these are checked and fixed first.
If you notice cosmetic damage or missing accessories, write down how it will be fixed and then decide if you want to go ahead. Don’t sign a satisfaction note if there are still problems that haven’t been sorted out.
Reinspect the original issue and adjacent areas affected by repair. Keep available job-card records.
Do not assume every defect produces the same refund or replacement outcome.
13. Final Handover Checklist
In the status column, write “satisfactory,” “issue found,” “not applicable,” or “not checked” as needed.
| Check | Status | Observation/action |
|---|---|---|
| Actual vehicle matches booking and allocation | ||
| Vehicle identifiers and documents match | ||
| Manufacturing details explained where requested | ||
| Visible bodywork inspected | ||
| Tyres, wheels and tyre seating checked | ||
| Pressure checked against applicable specification | ||
| Steering, suspension and brakes checked | ||
| Throttle operation demonstrated | ||
| Lights, horn and fitted controls demonstrated | ||
| Warning-light sequence explained | ||
| Display controls, illumination and clock checked | ||
| Petrol starting and applicable transmission controls demonstrated | ||
| Applicable fluids checked | ||
| EV ready state and riding modes demonstrated | ||
| Reverse or parking assistance demonstrated, where fitted | ||
| Applicable interlocks demonstrated | ||
| Starting or auxiliary-battery check confirmed | ||
| Charger supplied and charging demonstrated, where applicable | ||
| Charging-installation responsibilities confirmed | ||
| Keys, fobs and backup access supplied and tested | ||
| Account access and purchased connected functions verified | ||
| Warranty and service information received | ||
| Included equipment and accessories accounted for | ||
| Registration and insurance checked | ||
| Fuel or charge suitable for the onward journey | ||
| Odometer and delivery readings recorded | ||
| Repairs rechecked | ||
| Pending items acknowledged in writing |
Check Small Supplied Items
Don’t just accept a general statement that you received all accessories.
| Item | Included in your package? | Supplied or pending? |
|---|---|---|
| Owner’s manual or official digital access | ||
| Tool kit | ||
| First-aid kit | ||
| Spare fuses | ||
| Spare key or additional fob | ||
| Emergency mechanical key | ||
| Charger and supplied cables | ||
| Purchased accessories | ||
| Warranty and service information |
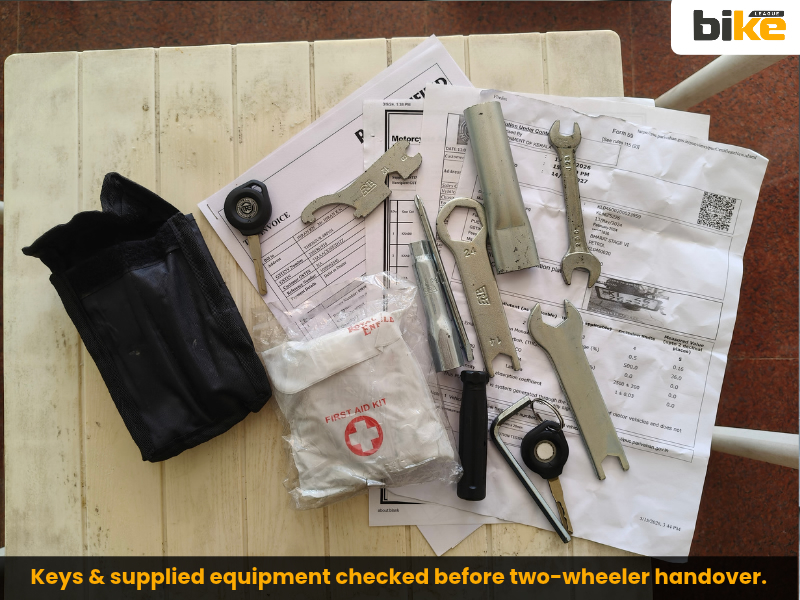
The Activa sheet lists the tool set, first-aid kit, spare key, owner’s manual, and spare fuses. These are helpful reminders, but you should always check what’s actually required for your vehicle and purchase package. Sources: Activa 125 check sheet.
What Can You Do If A Dealer Does Not Resolve A Pdi-related Complaint?
If your dealer or manufacturer doesn’t fix a vehicle defect, delivery issue, or service complaint, here’s what you can do:
- Contact the dealer in writing: Describe the issue and request a clear resolution.
- Escalate to the manufacturer: Share the complaint, photographs, inspection report, and dealer response with the manufacturer’s customer-care team.
- Approach the National Consumer Helpline: Register a grievance through consumerhelpline.gov.in or call 1915.
- File a consumer complaint: If the dispute remains unresolved, you may approach the appropriate Consumer Commission through the e-Jagriti portal.
Under Section 39 of the Consumer Protection Act, 2019, a Consumer Commission may order remedies such as removal of defects, replacement, refund, or compensation when the complaint is established. The remedy depends on the facts and evidence; a PDI finding alone does not automatically guarantee a refund or replacement.
Hold on to your booking form, invoice, payment receipts, insurance papers, PDI checklist, photos, repair records, emails, and complaint reference numbers as proof.
How Much Does Pdi Cost For A New Bike In India?
The dealer’s technical PDI is included in getting your vehicle ready for handover. Ask if there’s any extra inspection fee and request a breakdown before you pay.
If you hire an independent inspector, the fee depends on the vehicle, location, inspection scope and provider. Confirm the price, checks included, written report, dealer access requirements and reinspection charges before booking.
Don’t mix up an independent PDI fee with charges for handling, logistics, or paperwork. Ask your dealer to explain each charge and give you an invoice.
Should You Book An Independent Pdi?
Find out exactly what the service covers before you pay.
Confirm:
- Compatibility with the exact model.
- Dealer permission and access requirements.
- Visible-inspection scope.
- Diagnostic equipment and supported systems.
- Whether charging is witnessed.
- Whether a ride is included and permitted.
- Whether battery capacity is measured or a displayed value is recorded.
- Written-report contents.
- Exclusions and access limitations.
- Cost and reinspection terms.
Just because a service mentions battery, motor, charging, software, or regenerative braking doesn’t mean it explains how the tests are done or what counts as passing.
Don’t believe anyone who says an inspection guarantees safety, range, or a vehicle without faults.
Where Can I Book An Independent Bike Pdi In India?
You can check out TruePDI, which offers pre-delivery inspections for motorcycles and scooters, including electric models. Before booking, contact them to confirm if they serve your city, if your model is covered, what’s included, the price, and the report format.
This is just an example, not a recommendation. Always check the provider’s credentials and make sure your dealer allows the inspection.
Frequently Asked Questions
1. Is There One Acceptable Odometer Reading For A New Bike Or Scooter?
This guide doesn’t set a specific number.
Write down the odometer reading, ask for an explanation, and check the vehicle’s condition and records. Don’t decide if a vehicle is good or bad based only on the odometer.
2. How Long Should Pdi Take?
Give yourself enough time for all the checks, demonstrations, and to review the documents.
There’s no set time that proves every model was checked properly. If you couldn’t access or see something, make a note of it.
3. Must An Ev Be Delivered Fully Charged?
Look at the manufacturer’s instructions and your handover plan, and make sure there’s enough charge for your trip.
The supplied e-scooter job card instructs charging to 100% before delivery, but that is an instruction in that particular document, not evidence of a universal requirement for all electric two-wheelers. Sources: E-Access check sheet.
4. Does A 100% Charge Display Prove Good Battery Health?
No. It records the displayed charge level, not a complete usable-capacity assessment.
Find out what each SOH or diagnostic reading means, how it was measured, and if a separate capacity test was done.
5. Should I Check An Ev’s Auxiliary Battery?
Ask whether one is fitted and whether its condition has been checked. The e-scooter job card lists the auxiliary battery separately from the traction battery. Don’t assume that a charged traction battery means the auxiliary battery is also in good condition. Sources: E-Access check sheet.ess check sheet.
6. Can I Open The Engine, Battery Or Controller?
Don’t take apart any components during your PDI. If needed, ask for an authorised technical assessment.
Similarly, avoid disconnecting terminals, probing charging contacts, or bypassing safety switches when checking for issues.
7. Must Every Vehicle Come With Two Keys Or Two Fobs?
Look at the model’s equipment list and your purchase package to see what’s included.
Count and test each key or fob you receive. Ask for a demonstration of the backup access method if there is one.
8. What If The Dealer Will Not Allow A Ride Or Diagnostic Scan?
Make a note of any restrictions and what you couldn’t check.
Ask if there’s another way to see a demonstration or if the dealer has an inspection record. Don’t mark a test as done if it wasn’t completed.
9. What If Something Is Pending At Delivery?
Write down what’s pending, who is responsible, when it should be done, and any costs involved.
Don’t confirm that everything is supplied or fixed if it isn’t.
10. What Should I Do If Pdi Reveals Defects?
Take photos of any issues and tell the dealer before you accept delivery. Ask for written confirmation of the repair or replacement and when it will be done. Check the area again after it’s fixed. If there are still safety, structural, or mechanical problems, wait to accept the vehicle until they’re sorted out.
11. Does A Completed Dealer Pdi Replace My Inspection?
No. The dealer’s technical checks and your own review of the vehicle’s identity, condition, equipment, and documents are separate steps.
The supplied check sheets themselves combine technical checks with separate identification, equipment, and completion records. Sources: Activa 125 check sheet; E-Access check sheet.
12. Is Pdi Needed For A Second-hand Bike Or Scooter?
Yes. Before you buy a used motorcycle or scooter, get a pre-purchase inspection, ideally from a skilled mechanic. Besides checking identity, documents, and basic functions, the inspection should cover maintenance history, wear, past repairs, and any damage. This article is mainly about new-vehicle delivery checks and isn’t a full used-bike checklist.
Model-specific Source Checklists
The three Scribd documents show checks for different two-wheeler models. They’re extra references, not official technical standards. Just because a checklist is on Scribd, has branding, or mentions an owner’s manual doesn’t mean it’s from the manufacturer. Always use your vehicle’s current manual and follow dealer procedures for technical details and decisions.
- Suzuki E-Access electric scooter
Linked document: E-Access PDI Check Sheet How it informs this guide: Electric drive, charging, auxiliary battery, and handover prompts described in the supplied article.
- Honda Activa 125 petrol scooter
Linked document: Annexure A – PDI Check Sheet How it informs this guide: Appearance, controls, electrical checks, engine operation, riding checks, defect recording, and technician/sales certification.
- TVS Apache RTX 300 BTO petrol motorcycle
Linked document: TVS Apache RTX 300 BTO PDI Checklist How it informs this guide: Custom-order equipment, adjustable suspension, TPMS where purchased, cooling, quickshifter, diagnostics and post-ride reinspection prompts.
The Activa page was available at the time of this update. The E-Access and TVS Scribd pages couldn’t be accessed directly, so their details come from the article and the uploaded TVS checklist. Features and technical specs from those two Scribd pages haven’t been independently checked.
Don’t assume that clutch free play, tyre pressures, charging targets, battery limits, number of keys, or optional features are the same for every model. The year in this article’s title doesn’t mean these documents were published in that year.
Other Related Links From Bikeleague India
- Bike Insurance Terms and Add-ons in India – Understand policy terminology and optional covers when reviewing your new two-wheeler’s insurance.
- Bike Documents for Travel in India – Read more about motorcycle documents and digital records before your first journey.
- Electric Bike and Scooter Maintenance Tips – Explore charging routines, tyre checks, servicing and storage after taking delivery.
- Motorcycle Fuel Types and Precautions – Learn more about fuel choices and compatibility when checking your petrol motorcycle or scooter.
- Bike Unit Converter – Convert tyre-pressure units using the pressure values specified in your vehicle’s owner’s manual.
Conclusion
A good PDI records details about the exact vehicle you’re getting. Start by checking identity and paperwork, inspect the parts you can access, and ask for demonstrations of key features.
Always use the right manual for technical steps. For EVs, pay as much attention to charging gear, auxiliary battery checks, battery details, and account access as you do to the vehicle itself.
Write down anything you can’t explain, make sure you know which checks weren’t done, and double-check any repairs before you accept the vehicle.
If you have questions or feedback about this bike and scooter PDI checklist, leave a comment below or email bikeleagueindia@gmail.com. For questions about your vehicle’s condition, delivery, warranty, or inspection needs, please get in touch with your dealer or manufacturer directly. Please contact your dealer or manufacturer.